This triptych is definitely telling a story. But what is it? When I
started making it, I really didn't have anything in mind, but the more I
looked at it, the more it became something.
I showed it to my
sister and she said (roughly) "He's reading the flower like tea leaves
and he can see her in it. Blue sky and green grass turn dark and wicked.
Ooh."
Fabulous!
Better than anything I thought up.
What story do you see in it?
I started with the Arch Top Triptych 8 Inch.
I cut my papers for the backs of each piece and set them aside.
I cut four pieces of linen hinge tape about 4 inches long. (you can get it HERE)
Line
up your triptych pieces and make sure all the bottoms are even with
each other and attach two pieces of the tape to the chipboard to connect
the pieces. making sure the tape is pretty even as well.
Then I
turned the piece over and attached the other two pieces of tape, going
into the dip between the chipboard pieces so I had a solid connection
with the exposed sticky bits of the tape on the other side.
I glued the paper I cut to the back side of the triptych.
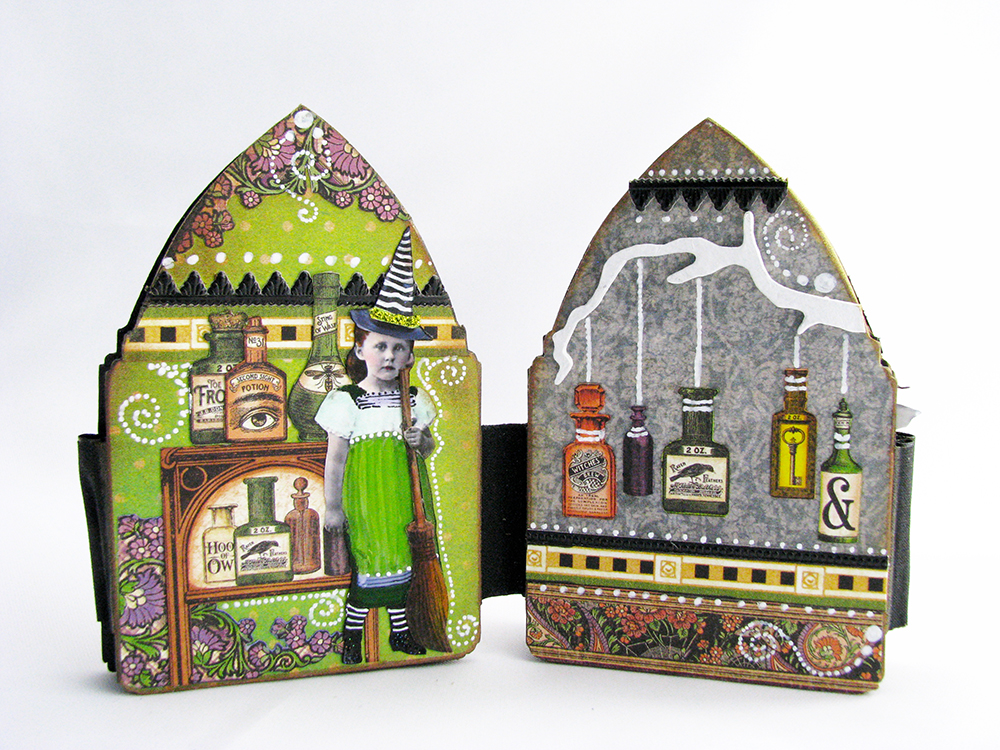
NOTE:
the three components of the triptych are slightly different from each
other, so I used EACH one as a template for the paper I cut. That way,
all the bottoms and outside edges fit. I set it aside.
Next, I gave the arches a good coat of gesso. I love gesso.
After the gesso dried, I painted the arches red. I really like Golden's Napthol Red Medium.
I let it dry completely. And then!!!
And
then....because I wanted a little added richness, that super bit of
drenched color, I painted a coat of Quinacridone Magenta on top of the
red.
Oh, double biscuits, is it ever pretty!
I set it aside and let it dry.
After I stopped staring at it.
Then I started playing with bits of torn paper and the original image that got me going in the first place.
I
made gently sloping hills and began drafting my collage, letting it
unfold and bring in the red arches from time to time to check overlap
and flow.
This is where I started.......
And this is where I ended up.
In the picture below, nothing is glued down and no fine details are added.
I usually take a picture at this point as a reference for where everything goes before I take it apart and glue things down.
Next, using matte medium (I use either Liquitex or Golden Matte Medium) I attach all the paper bits one layer at a time.
After
it dries completely, I put on at least one coat of matte varnish. Two
is what I do mostly, letting each coat dry thoroughly before applying
the next one.
Varnishing your pieces is really important for
permanency. Paper is ephemeral and varnishing gives it a lot longer
life, and makes it as waterproof as paper can get.
After the varnish dries, I glue the red arches on the triptych. Make sure you glue them on the correct pieces.
After
the glue dries, I applied another coat of varnish, back and front. (for
this piece, this was the second coat of varnish.....I wanted to make
sure the arches got a coat as well)
I added painted details, like all the little dots and swirls and painted in the stones on her head piece...
making sure I added those same detail dots and swirls to the wizard's panel for continuity.
and added a few metal findings at the top of the arches.
Don't for get to sign your work!
Also,
for anyone that is interested, the image of the woman is called 'Head
of a Lady in Medieval Costume' by Lucien Victor Guirand de Scevola.
Painted about 1900.
SUPPLIES
Arch Top Triptych 8 Inch
Graphic 45 French Country (for the sunflowers) Communique (cream and black harlequin for the hills)
Ella and Viv Watercolor Paradise Scrapbook paper (the sky)
Bo Bunny Double Dot Vintage (for the hills)
Acrylic paints
Varnish
Matte medium
Metal findings
Thank you very much for stopping in!
Showing posts with label Witch. Show all posts
Tuesday, November 20, 2018
It Could Be A Fairytale.
Labels:
Cackle and Hoot,
Gypsy Soul Laser Cuts,
Lora Mahaffey,
Reliquary-Arch Top,
Triptych,
Witch,
Wizard
Wednesday, September 6, 2017
The Strange Kidlets Halloween Fold-out Book
I cannot get enough of Halloween. I have been having fun with these little fold-out books and here's another one...this time it's strangely gifted children. Or maybe gifted kidlets who are strange. Whatever. They are all a bit peculiar in one way or another and that makes them interesting.
This little girl, let's call her Wilhelmina, shall we? Some children have lemonade stands or sell cookies. Little Willa looks like she could whip you up a good old repel spell or a homework charm faster than you can cackle.
And this kidlet, James-Luce has got himself a rather interesting sidekick. Both styling with their green top hats. I wonder which one of them is reading that stack of books?
James-Luce has informed me that Hodge (the cat) is currently reading "Anthropology and Mythical Creatures, a Study of Synchronistic World Tales" aloud at tea time. So there we have it.
And these two, Tyburn and Thalia have scarpered off to a large pumpkin patch where they have release the flying pumpkins and plan on joining them for a wild flight across the river and on to the local pub for some fish and chips and a fizzy lemonade. They look a bit guilty, but I don't think anyone has noticed that the flying pumpkins have gone missing again.
So yes, they are all a bit strange, but I certainly will not be pointing any fingers. Heh.
And now, a quick little tutorial on how I did the letters on the back of the book.
Since I had already painted the backs of the book pages, I decided to attach the letters to some card stock for contrast and easier reading.
After edging the card stock with ink, I glued the letters down and let them dry. I glued them down to the page backs and gave them a coat of matte medium to take the shine off of them.
Once everything was dry, I used a fine tip Sharpie Paint Marker to outline the letters, and then filled them in with a broader tipped marker. Then added a couple of dots to each page for a little extra detail. Super easy and very effective!
Here you can see, using a larger marker, I filled in the letters to give them a bit more punch.
If you would like to see a tutorial on how the book was constructed, click this LINK.
For a complete list of supplies from the wonderful Alpha Stamps click HERE.
Supplies:
Arch Top House Silhouette
Dresden Trim:
Black Zig Zag Dresden Borders
Tiny Dot Dresden Borders
Little Sweeties Collage Sheet
Halloween Dress Up Collage Sheet
I've been Mooned Collage Sheet (the peeking eyes at the bottom of the far right house)
Creepy Tree-8 Inch
Stickles: Lime and Black Diamond
various scrap bits from both G45 Olde Curiosity Shoppe and And Eerie Tale from the 8x8 paper pad.
Black acrylic paint
White acrylic paint
Thank you for stopping by!
Labels:
Alpha Stamps,
Bats,
Cackle and Hoot,
Cats,
children,
Familiars,
Halloween,
Lora Mahaffey,
Pinterest,
Potions,
Pumpkins,
Spells,
Trick or Treat,
Witch,
Witches
Tuesday, September 5, 2017
The Witching Hour is Time for Tea
Hello all! Lora Mahaffey here in full Halloween mode. My favorite holiday. I know, I have never said that before.
I'm enjoying playing with all the wonderfully rich fall colors. I am looking forward to rustling leaves, sweater weather and all things pumpkin (pumpkin muffins!). And tea on the porch wrapped up against the early morning chill.
The ladies have been doing late night recon.....flying about, checking on the night birds and woodland creatures, making sure the forest is healthy, celebrating the night, the stars and the beautiful moon. All is well, so they've given their brooms a needed rest and it's time for tea!
I began with the Display Tray Dome (which is coming soon!).
I painted the front frame work black and papered the back with a becoming shade of gray.
Using the front frame work as a template I lightly drew around it, defining the spaces and allowing me to work within them without the frame being in the way. You can kind of see the pencil marks. Sorry for the not very clear picture, I think you can see what I mean.
I then began composing and then gluing the main images into the frames I liked them in. Trying to be mindful of balance and visual weight. You can see the pencil marka bit better here.
After all the main players were glued down, I glued the face frame in place. It makes a big difference!
Now it's time to play! I didn't have a plan for this. I just played with various things I cut out that caught my eye until they looked right and the ladies started to take on more personality. I also played with my favorite tool of the moment...a Sharpie Poster Paint Pen (I like the acrylic one NOT the oil based one) and added some dots and swirls.
I think this lady really likes her candy corn. And she has pretty fab hair.
And why not a little masked dancing with your favorite bats after tea?
SUPPLIES:
Display Tray Dome (coming soon)
Acrylic Paint (black and white)
Sharpie Fine Poster Paint Marker (white)
Stickles in Lime Green, Black Diamond, Sunflower and Orange Peel
Various Collage Images from Sandy Gordon's ART TEA LIFE
Thank you for stopping by!
Labels:
Broomsticks,
Cackle and Hoot,
Display Tray Dome,
Gypsy Soul Laser Cuts,
Halloween,
Lora Mahaffey,
Tea,
Teapot,
Witch,
Witches
Wednesday, July 19, 2017
The Wyrd Sisters School of Beauty
WELCOME!
Welcome to the WYRD SISTERS SCHOOL OF BEAUTY!
Here at WySSBy we know that beauty goes deeper than skin!
Yes, indeed, and we are here to help you achieve your beauty goals. All you have to do is pick up the phone and call 1-800-555-WART and you'll be on your way to a beautiful new you!
When you join the amazing family that is THE WYRD SISTERS SCHOOL OF BEAUTY you will receive this AMAZING FREE GIFT.
Yes, Ladies and Gentleman, you and your friends will be amazed by the AMAZING changes in your appearance and attitude.
YOU CAN"T GO WRONG!!!
Here's a closer look at a few of the wonders inside.......
New and REVOLUTIONARY Spider Lash Mascara, now in a Lush Leg Formula!
Updated and better-than-ever ADD-A-WART KIT! It's amazing!
And just in case you are ever at a loss for a snappy comeback, we've included this new spell formula, THE SNARKY RETORT!
Never find yourself short a sarcastic comment again! Amaze your friends!
Mix your own potion formulas (All ingredients conveniently provided!!) for glowing skin and finish your look with Blotch-n-Go Face Powder. Add a hint of roughness to those lips with Chap and Peels Original Lip Balm.
Yes, Folks, all this and more can be yours!
All YOU need to do is pay $59.95 shipping and handling and we' ll send this Priority Mail! (Canada deliveries not guaranteed. Overseas orders $799.99)
DON'T WAIT!
This is a limited time offer. Call 1-800-555-WART for your Amazing Beauty makeover today!
Thank you once again to the fabulous (and amazing!) Alpha Stamps for providing most of the supplies used in this nutsy piece!
For a link to all the supplies provided by Alpha Stamps, click Here.
Supplies List
Little Household Goods Collage Sheet
Secret spell Book Labels Collage Sheet
Little Potions Collage Sheet
Small Dresden Frame with Shell Corners
Mini Cigar Box- 3x4
Mini Cigar Box Set
1 Inch Glass Bottle with Cork
1-1/2 Inch Glass Bottle with Cork
12 Tiny Glass Bottles
Amber resin Potions Bottle
Corked Vials (the tall skinny one)
Large Clear Resin Potions Bottle
Mini Inkwell Bottle
Tiny Round Bottles
White Resin Condiment Bottle
Mini Floral Dresden Borders-Antique Gold
Wide Scalloped Dresden Border (painted white)
Mini Mason Jar-Medium
Stickles-Lime Green and Diamond
Metal Paint Can with Lid
Additional Supplies
Bo bunny Sweet Moments Scrapbook Papers
Various Beads for Lids
Linen Hinging Tape
Acrylic Paints
Filigree Frames Shape Set (from Gypsy Soul Laser Cuts)
Hopefully no one is THAT gullible, but just in case.....
This was not a real advertisement.
Okey dokey.
Thanks for stopping by!
Welcome to the WYRD SISTERS SCHOOL OF BEAUTY!
Here at WySSBy we know that beauty goes deeper than skin!
Yes, indeed, and we are here to help you achieve your beauty goals. All you have to do is pick up the phone and call 1-800-555-WART and you'll be on your way to a beautiful new you!
When you join the amazing family that is THE WYRD SISTERS SCHOOL OF BEAUTY you will receive this AMAZING FREE GIFT.
Yes, Ladies and Gentleman, you and your friends will be amazed by the AMAZING changes in your appearance and attitude.
YOU CAN"T GO WRONG!!!
Here's a closer look at a few of the wonders inside.......
Updated and better-than-ever ADD-A-WART KIT! It's amazing!
And just in case you are ever at a loss for a snappy comeback, we've included this new spell formula, THE SNARKY RETORT!
Never find yourself short a sarcastic comment again! Amaze your friends!
Mix your own potion formulas (All ingredients conveniently provided!!) for glowing skin and finish your look with Blotch-n-Go Face Powder. Add a hint of roughness to those lips with Chap and Peels Original Lip Balm.
Yes, Folks, all this and more can be yours!
All YOU need to do is pay $59.95 shipping and handling and we' ll send this Priority Mail! (Canada deliveries not guaranteed. Overseas orders $799.99)
DON'T WAIT!
This is a limited time offer. Call 1-800-555-WART for your Amazing Beauty makeover today!
Thank you once again to the fabulous (and amazing!) Alpha Stamps for providing most of the supplies used in this nutsy piece!
For a link to all the supplies provided by Alpha Stamps, click Here.
Supplies List
Little Household Goods Collage Sheet
Secret spell Book Labels Collage Sheet
Little Potions Collage Sheet
Small Dresden Frame with Shell Corners
Mini Cigar Box- 3x4
Mini Cigar Box Set
1 Inch Glass Bottle with Cork
1-1/2 Inch Glass Bottle with Cork
12 Tiny Glass Bottles
Amber resin Potions Bottle
Corked Vials (the tall skinny one)
Large Clear Resin Potions Bottle
Mini Inkwell Bottle
Tiny Round Bottles
White Resin Condiment Bottle
Mini Floral Dresden Borders-Antique Gold
Wide Scalloped Dresden Border (painted white)
Mini Mason Jar-Medium
Stickles-Lime Green and Diamond
Metal Paint Can with Lid
Additional Supplies
Bo bunny Sweet Moments Scrapbook Papers
Various Beads for Lids
Linen Hinging Tape
Acrylic Paints
Filigree Frames Shape Set (from Gypsy Soul Laser Cuts)
Hopefully no one is THAT gullible, but just in case.....
This was not a real advertisement.
Okey dokey.
Thanks for stopping by!
Labels:
Alpha Stamps,
Cackle and Hoot,
Lora Mahaffey,
Mini Cigar Box,
Potions,
Witch
Subscribe to:
Posts (Atom)