
A book box for each, and I admit, though you probably already guessed this, the Evil Queens were my favorite!
I've also had a couple of e-mails asking how I used the linen hinging tape from my last two books, so I have included a wee tut on that as well. Easy peasy and thanks for asking!

Let's start with the Fair Maidens, shall we?
Those girls, always getting into trouble! Whether from their own choices or others machinations, the situations they get themselves into are pretty crazy.
Curses, sleeping for a hundred years, household slavery, poisoning, betrayal....it's a real soap opera!
Here are a few of the girls tucked away in their box.

And here they are having a bit of a stretch. I'm not going to leave them out too long. There's no telling what mischief they'll get themselves into!

I used a lot of pretty luscious collage sheets from Alpha Stamps for the images of the girls and they are listed in the supplies below.

We'll say goodbye to the girls for the moment and move on to the queens.

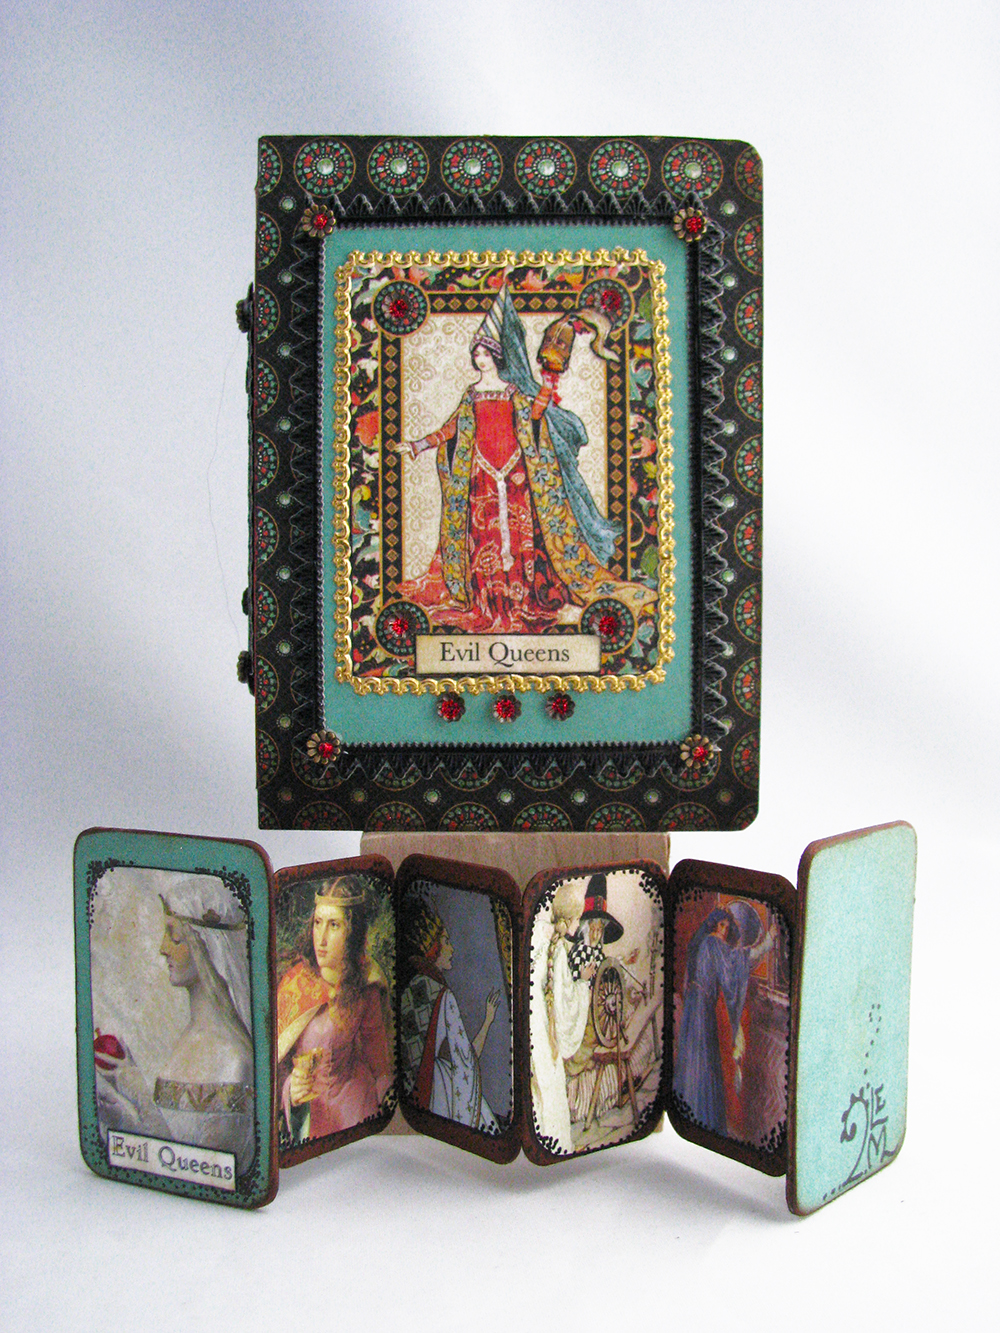
Ah, Evil Queens......they're just not happy without a good poisoning or a beheading, are they? Looks like this one is holding the head of a knight. He must have really pissed her off. That or Mrs. Grumpy Pants got up on the wrong side of the royal bed.

Here's a lovely shot of Queen Eleanor forcing some poison upon the pretty, but hapless Fair Rosamund.
And an array of nasty tempered ladies just looking for someone to whack with their scepters.
Overall, I think they are a fairly sneaky group of pestilential ladies and prefer less obvious means of torture, murder and mayhem. Ooh, this is interesting. A secret stash of poisons! Okay, which one of you 'ladies' smuggled those in here?
Or did all of you connive together? Hmmmm, better keep my eye on you!

For a link to supplies, click HERE for supplies for Fair Maiden and HERE for Evil Queens Supplies.
Supplies list:
Fair Maidens Supplies
ATC Sized Faux Book Box
Graphic 45 Enchanted Forest Scrapbook Papers
Rapunzel Collage Sheet
The Ball Collage Sheet
Midnight #1 Collage Sheet
Cinderella Cleaning Collage Sheet
Sleeping Beauty #2 Collage Sheet
Fair Rosamund Collage Sheet (?)
Thin Fleur Dresden Borders-Black
Gold Mini Rosette Dresden Borders
Liquid Pearls-Platinum
Liquid Pearls-Gold Pearl
7mm Flower Washers
Old Fashioned Roses-Red
12x12 Chipboard
Other
Burgundy Ribbon
Linen Hinging tape
Evil Queens Supplies
ATC Sized Faux Book Box
Graphic 45 Enchanted Forest Scrapbook Papers
Evil Queens Collage Sheet
Fair Rosumund Collage Sheet
Skeleton Slides Collage Sheet
7mm Flower Washers
Gold Mini Rosette Dresden Borders
Black Zig Zag Dresden Borders
12 Tiny Glass Bottles
Corked Vials
12x12 Chipboard
Sparrows Compass Brass Link (substitution for the filigree flower on the Evil Queens Mini Book Holder)
Stickles Christmas Red
Stickles Lime Green
Stickles Black Diamond
Liquid Pearls Blackberry
Other
Round Corked Glass Vial
Craft Jewelry Box Lid (cut in half)
Manila File (cut into a strip and folded accordion style for the Evil Queens mini book)
Linen Hinging Tape
BUT WAIT! THERE'S MORE!
A little tutorial on linen hinging tape and how I use it;
For hinging the Fair Maidens Book Box, whose cover opens and lies flat, I first cut two pieces of tape slightly shorter than the length of the box.
I 'loosely' stuck them on making sure I left enough wiggle room in the space between the covers to allow for the width of scrapbook papers. If you don't allow for this important step, your book may close properly at this point, but won't later on after you've covered the chipboard with papers.
I measured the gap and it's about a quarter inch (1/4) of tape showing between each chipboard piece.


After I was satisfied with the placing of the tape, I used a bone tool to rub the tape onto the chipboard, making sure I had good adhesion.
For extra strength, I laid a piece of tape vertically across the book and used the bone tool on that one well.

Now that the fussy part is finished, I prepped the surface by painting the tape black just over the actual hinge-y bit. It's easier to do this at this stage rather than trying to fuss with painting after you've got your papers on.

While I've got the paint out, I prep any other surface I need to before the papers go on, including the corners of the inside of the box so no light brown from the chipboard shows.
For the Evil Queens box it's the same thing, more or less.
Since there is only one hinge to deal with, it's one piece of tape vertically, making sure once again to leave an appropriately sized gap for papers.
For this application I use two pieces of tape horizontally for strength. Then prep with paint as needed.

I should also mention that I pre-cut all of my papers before I tape things together. Much easier that way!
Thank you for stopping by!


