

Thursday, December 20, 2018
Site Reno
Now that the studio is finished, I am turning my thoughts towards redoing the blog. Poor thing is looking a bit long in the tooth and could use some changes. Just letting you know this will be happening after the holidays. 2019....new and fresh!

Tuesday, December 18, 2018
Ornament Making Event
Hello everyone! Lora here to share a couple very special days we had here in my neck of the woods!
We had two wonderful ornament making events for children (and grown-ups!) here in Patrick County, Virginia sponsored by The Reynolds Homestead and our own wonderful Gina, owner of Gypsy Soul Laser Cuts. Through Gina's generosity and kindness, we were able to make over 150 ornament kits for kids to put together at two separate events...one was at the Apple Dumpling Festival and the second was held this past week end, A Victorian Open House at the old Reynolds Homestead.
We all had a blast.
Here are some pictures of what went on.
A shot of two of the kits we made and had out at the Festival, ready and waiting for the kids...
 A snowman enthusiast having a good time!
 Working on the details...
 This little boy was so happy to be here. He worked very patiently through one kit after another, making presents for his family.
 The
Victorian Open House was challenged by weather, but we still had a
steady stream of kids and adults who enjoyed making the ornaments. Here
is a great picture of the Victorian ladies decked in their finest, ready
to do tours of the old house. Standing in front of the twelve foot
Christmas tree at the learning center.
The
Victorian Open House was challenged by weather, but we still had a
steady stream of kids and adults who enjoyed making the ornaments. Here
is a great picture of the Victorian ladies decked in their finest, ready
to do tours of the old house. Standing in front of the twelve foot
Christmas tree at the learning center.
 Lots of folks making ornaments.
 One of the Victorian ladies taking a break from house tours and the rain, making an ornament.
 A little girl and her grandma making ornaments together.
 The two most popular kits from both events were the Snowman and the Christmas tree.

 Thank you, Gina for helping to make these events so special!
We made kits from versions of these laser cuts:
Winter Snowman Banner
Gingerbread Family Shape Set
Christmas Shape Set
ATC Shrine Box
Thank you for stopping by!
We had two wonderful ornament making events for children (and grown-ups!) here in Patrick County, Virginia sponsored by The Reynolds Homestead and our own wonderful Gina, owner of Gypsy Soul Laser Cuts. Through Gina's generosity and kindness, we were able to make over 150 ornament kits for kids to put together at two separate events...one was at the Apple Dumpling Festival and the second was held this past week end, A Victorian Open House at the old Reynolds Homestead.
We all had a blast.
Here are some pictures of what went on.
A shot of two of the kits we made and had out at the Festival, ready and waiting for the kids...


We made kits from versions of these laser cuts:
Winter Snowman Banner
Gingerbread Family Shape Set
Christmas Shape Set
ATC Shrine Box
Thank you for stopping by!
Tuesday, December 11, 2018
We've come a long way.......part one.
My studio is pretty much finished with the exception of a few minor details and I'm moved in! So very happy in this beautiful, creative space and I want to thank my uber wonderful husband who has mad skills, fortitude and tons of patience. And our fabulous contractor Ron, who breathed fresh life and confidence into what was once an overwhelming and discouraging project. Ron, we can't thank you enough! You got us back on track and made us feel that we could do this. Your hard work, creativity and masterful carpentry took this space over the top and the big bonus is we count you as a friend. Thank you, Thank you.
A few before and after pictures.
This is the north (ish) facing wall looking into the back garden and our woods.
Before:
 After:

This was taken standing with my back to the north (ish) wall facing the the other side of the studio and the stairway leading to the upstairs hall.
Before:
 After:

Standing in the doorway of the studio looking at the basement hallway.
Before:
 After:
 I was not kidding when I said this is my happy space. Somebody pinch me!
I'll post more shots soon with some details and explanations of some of the things that make this space personal and special.
Thank you for coming by, it means a lot to me!
A few before and after pictures.
This is the north (ish) facing wall looking into the back garden and our woods.
Before:


This was taken standing with my back to the north (ish) wall facing the the other side of the studio and the stairway leading to the upstairs hall.
Before:


Before:

I'll post more shots soon with some details and explanations of some of the things that make this space personal and special.
Thank you for coming by, it means a lot to me!
Tuesday, December 4, 2018
Little Christmas Tags
Hello everyone and Happy December! Here I am playing with the adorable Small Tag Set for Gypsy Soul Laser Cuts.
These are so cute and perfect for adding that sweet final touch to a special gift.
They come in a set of 10, so there are lots to play with and if you only use a few, you'll have some for gifts later on.
I decided to use five for tags and save the other five for special Christmas ornaments I want to make later on for my tree.
 Here is where I began...
I used the tags as templates for cutting my paper. There are three different shapes, so be mindful of that as you cut your paper.
 I glued the papers on front and back and set them aside. Whilst they were drying, I painted the Punch Elements Deco back pieces white and let them dry.
 I inked the edges of the tags and around the edges of the Deco label backs with gold ink.
I used Brilliance Galaxy Gold, but you can use whatever ink you like best.
Then, using a 1-inch hole punch, I cut out the birds and a poinsettia for the top circle bit of the Deco label and glued them on.
 I
cut strips of paper from the Nordic Greetings scrapbook paper page from
Graphic 45's Winter Wonderland and glued it down the center of each
tag, poked the holes through each tag top and glued on the completed
Punch Elements Deco labels.
I
cut strips of paper from the Nordic Greetings scrapbook paper page from
Graphic 45's Winter Wonderland and glued it down the center of each
tag, poked the holes through each tag top and glued on the completed
Punch Elements Deco labels.
 I added a lot of glitter.
Mostly because I can.
 I added green ribbon and a pretty gold bead to each tag.
A simple project that adds a lot of impact to a special present!
SUPPLIES
Small Tag Set
Punch Elements Deco labels
Graphic 45 Winter Wonderland papers
Ribbon
Beads
White acrylic paint
Stickles Glitter Glue in Christmas Red and Lime Green
Thank you for visiting!

These are so cute and perfect for adding that sweet final touch to a special gift.
They come in a set of 10, so there are lots to play with and if you only use a few, you'll have some for gifts later on.
I decided to use five for tags and save the other five for special Christmas ornaments I want to make later on for my tree.

I used the tags as templates for cutting my paper. There are three different shapes, so be mindful of that as you cut your paper.


I used Brilliance Galaxy Gold, but you can use whatever ink you like best.
Then, using a 1-inch hole punch, I cut out the birds and a poinsettia for the top circle bit of the Deco label and glued them on.


Mostly because I can.

A simple project that adds a lot of impact to a special present!
SUPPLIES
Small Tag Set
Punch Elements Deco labels
Graphic 45 Winter Wonderland papers
Ribbon
Beads
White acrylic paint
Stickles Glitter Glue in Christmas Red and Lime Green
Thank you for visiting!

Wednesday, November 28, 2018
Jewelry for sale on December 8th.
Just a little sampling of what will be for sale on December 8th at the (soft) opening of my new studio.
So much fun to play with silver!
 Thank you for visiting!
So much fun to play with silver!

Friday, November 23, 2018
Little House Pins and Ornaments
Hello all! Just a quick little post on some fun things I'm selling at my studio open house in December.
Yep, my studio is finally up and running! There will be a full post later on with before and after pictures of all the work we did, but for now, here's some eye candy!
 These are little pins about 2 1/2 inches tall and full of glitter and little Swarovski crystals.
 They were made from some wood scraps from my husbands shop, gesso'd and covered with paper scraps, then I used a great collage sheet from Alpha Stamps called Tiny House Trims Collage Sheet for both the pins and the ornaments pictured below for all the cute little doors.
 You can see more pics of these cute ornaments and supplies on Alpha Stamps HERE.
I used acrylic paint to make everything look snowy and added glitter to the snow and lets face it, wherever I wanted to, because GLITTER. Little Swarovski flat back crystals added extra sparkle.
I used a lot of Diamond Stickles on both the pins and the ornaments. I wired the ornaments, but I also used ribbon to hang quite a few of them as well. So much fun!
I hope everyone had a great Thanksgiving and are snuggling down into the coming winter and holiday season!
Thank you for stopping by!

Yep, my studio is finally up and running! There will be a full post later on with before and after pictures of all the work we did, but for now, here's some eye candy!


I used acrylic paint to make everything look snowy and added glitter to the snow and lets face it, wherever I wanted to, because GLITTER. Little Swarovski flat back crystals added extra sparkle.
I used a lot of Diamond Stickles on both the pins and the ornaments. I wired the ornaments, but I also used ribbon to hang quite a few of them as well. So much fun!
I hope everyone had a great Thanksgiving and are snuggling down into the coming winter and holiday season!
Thank you for stopping by!

Wednesday, November 21, 2018
Happy Thanksgiving!
Tildy, the Empress of the Universe and her human companions want to wish you all a very Happy Thanksgiving!


Tuesday, November 20, 2018
It Could Be A Fairytale.
This triptych is definitely telling a story. But what is it? When I
started making it, I really didn't have anything in mind, but the more I
looked at it, the more it became something.
I showed it to my sister and she said (roughly) "He's reading the flower like tea leaves and he can see her in it. Blue sky and green grass turn dark and wicked. Ooh."
Fabulous!
Better than anything I thought up.
What story do you see in it?
 I started with the Arch Top Triptych 8 Inch.
I cut my papers for the backs of each piece and set them aside.
 I cut four pieces of linen hinge tape about 4 inches long. (you can get it HERE)
Line up your triptych pieces and make sure all the bottoms are even with each other and attach two pieces of the tape to the chipboard to connect the pieces. making sure the tape is pretty even as well.
Then I turned the piece over and attached the other two pieces of tape, going into the dip between the chipboard pieces so I had a solid connection with the exposed sticky bits of the tape on the other side.
 I glued the paper I cut to the back side of the triptych.
NOTE: the three components of the triptych are slightly different from each other, so I used EACH one as a template for the paper I cut. That way, all the bottoms and outside edges fit. I set it aside.
 Next, I gave the arches a good coat of gesso. I love gesso.
 After the gesso dried, I painted the arches red. I really like Golden's Napthol Red Medium.
I let it dry completely. And then!!!
And then....because I wanted a little added richness, that super bit of drenched color, I painted a coat of Quinacridone Magenta on top of the red.
Oh, double biscuits, is it ever pretty!
I set it aside and let it dry.
After I stopped staring at it.
 Then I started playing with bits of torn paper and the original image that got me going in the first place.
I made gently sloping hills and began drafting my collage, letting it unfold and bring in the red arches from time to time to check overlap and flow.
This is where I started.......
 And this is where I ended up.
In the picture below, nothing is glued down and no fine details are added.
I usually take a picture at this point as a reference for where everything goes before I take it apart and glue things down.
Next, using matte medium (I use either Liquitex or Golden Matte Medium) I attach all the paper bits one layer at a time.
After it dries completely, I put on at least one coat of matte varnish. Two is what I do mostly, letting each coat dry thoroughly before applying the next one.
Varnishing your pieces is really important for permanency. Paper is ephemeral and varnishing gives it a lot longer life, and makes it as waterproof as paper can get.
 After the varnish dries, I glue the red arches on the triptych. Make sure you glue them on the correct pieces.
After the glue dries, I applied another coat of varnish, back and front. (for this piece, this was the second coat of varnish.....I wanted to make sure the arches got a coat as well)
I added painted details, like all the little dots and swirls and painted in the stones on her head piece...
 making sure I added those same detail dots and swirls to the wizard's panel for continuity.
and added a few metal findings at the top of the arches.
 Don't for get to sign your work!
Also, for anyone that is interested, the image of the woman is called 'Head of a Lady in Medieval Costume' by Lucien Victor Guirand de Scevola. Painted about 1900.
SUPPLIES
Arch Top Triptych 8 Inch
Graphic 45 French Country (for the sunflowers) Communique (cream and black harlequin for the hills)
Ella and Viv Watercolor Paradise Scrapbook paper (the sky)
Bo Bunny Double Dot Vintage (for the hills)
Acrylic paints
Varnish
Matte medium
Metal findings
Thank you very much for stopping in!

I showed it to my sister and she said (roughly) "He's reading the flower like tea leaves and he can see her in it. Blue sky and green grass turn dark and wicked. Ooh."
Fabulous!
Better than anything I thought up.
What story do you see in it?

I cut my papers for the backs of each piece and set them aside.

Line up your triptych pieces and make sure all the bottoms are even with each other and attach two pieces of the tape to the chipboard to connect the pieces. making sure the tape is pretty even as well.
Then I turned the piece over and attached the other two pieces of tape, going into the dip between the chipboard pieces so I had a solid connection with the exposed sticky bits of the tape on the other side.

NOTE: the three components of the triptych are slightly different from each other, so I used EACH one as a template for the paper I cut. That way, all the bottoms and outside edges fit. I set it aside.


I let it dry completely. And then!!!
And then....because I wanted a little added richness, that super bit of drenched color, I painted a coat of Quinacridone Magenta on top of the red.
Oh, double biscuits, is it ever pretty!
I set it aside and let it dry.
After I stopped staring at it.

I made gently sloping hills and began drafting my collage, letting it unfold and bring in the red arches from time to time to check overlap and flow.
This is where I started.......

In the picture below, nothing is glued down and no fine details are added.
I usually take a picture at this point as a reference for where everything goes before I take it apart and glue things down.
Next, using matte medium (I use either Liquitex or Golden Matte Medium) I attach all the paper bits one layer at a time.
After it dries completely, I put on at least one coat of matte varnish. Two is what I do mostly, letting each coat dry thoroughly before applying the next one.
Varnishing your pieces is really important for permanency. Paper is ephemeral and varnishing gives it a lot longer life, and makes it as waterproof as paper can get.

After the glue dries, I applied another coat of varnish, back and front. (for this piece, this was the second coat of varnish.....I wanted to make sure the arches got a coat as well)
I added painted details, like all the little dots and swirls and painted in the stones on her head piece...

and added a few metal findings at the top of the arches.

Also, for anyone that is interested, the image of the woman is called 'Head of a Lady in Medieval Costume' by Lucien Victor Guirand de Scevola. Painted about 1900.
SUPPLIES
Arch Top Triptych 8 Inch
Graphic 45 French Country (for the sunflowers) Communique (cream and black harlequin for the hills)
Ella and Viv Watercolor Paradise Scrapbook paper (the sky)
Bo Bunny Double Dot Vintage (for the hills)
Acrylic paints
Varnish
Matte medium
Metal findings
Thank you very much for stopping in!

Tuesday, November 6, 2018
A Winter Christmas Theater
It's time (at least for me) to think about Christmas. Being a person
that much prefers chilly weather, I love winter. It is beautiful nearly
all the time and there's nothing like the feeling of a snowy day, a hot
pot of soup on the stove and a real fire in the fireplace.
It's also the time of year when I feel the most creative and am more productive than any other time of year.
So hooray, and salutations to all the winter loving folks out there.
And let's talk holidays.
Love winter holidays. Christmas is a favorite partly because it gives me license to be extravagant, to celebrate a winter world with sparkle, color and cheer.
And now speaking of cheer, here is a vivid pink Christmas Theater!
Not a traditional wintery color, but festive nonetheless.
Here is the theater, stage set and ready for whatever story one would like to tell.
 Below,
I chose to fill the stage with a winter scene of house sparkling with
lights and snowy window sills. Surrounded by bottle brush trees.
Below,
I chose to fill the stage with a winter scene of house sparkling with
lights and snowy window sills. Surrounded by bottle brush trees.
 Here's how it began.....
 I dry fit the pieces of the Gypsy Soul Laser Cuts Stage.
I took them apart and cut and glued the papers I chose in place. The papers I used were all Bo Bunny from the Christmas Village Collection or the Double Dot Vintage line in Pink Punch.
I inked the edges of all the pieces and also inked in some 'folds' in the curtains by smoodging (my own word) ink on with my finger and a Qtip in places where I imagined shadows would be.
 I glued the stage together and set it aside to dry.
I painted white snowflakes from both the Snowflake Shape Set and the Snowflake Shape Set Minis.
I did the same with the Pine Tree Shape Set.
Set them aside to dry.
I cut houses from the Christmas Village paper, added glitter to all the wee lights (I used lots of different Stickles glitter for that and White Lace Stickles for the snowy window ledges) and let them dry.
After they dried, I cut and scored pieces of card stock and glued them on the back of each house.
 I
used Stickles Diamond to glitter up all the snow flakes and trees,
glued bits of cork painted white to the backs of the trees in various
depths (only the trees I used inside the stage to give some depth) and
did the same to the snowflakes I used in the stage.
I
used Stickles Diamond to glitter up all the snow flakes and trees,
glued bits of cork painted white to the backs of the trees in various
depths (only the trees I used inside the stage to give some depth) and
did the same to the snowflakes I used in the stage.
I glued in all my bits, and added some extra details (cut and glittered) from the Christmas Village paper.
 And the stage is ready to go!
 Have fun playing!
SUPPLIES
Stage
Snowflake Shape Set
Snowflake Shape Set Minis.
Pine Tree Shape Set
Additional supplies
Bo Bunny Village Christmas Scrapbook Paper
Bo Bunny Double Dot Pink Punch Vintage
Stickles glitter glue in Frosted Lace, Diamond, Lime Green, Orange Peel, Christmas Red and Glam Pink
White Acrylic paint
White Dresden Trim (you can get it HERE)
Bottle Brush Trees are available at lots of craft stores.
It's also the time of year when I feel the most creative and am more productive than any other time of year.
So hooray, and salutations to all the winter loving folks out there.
And let's talk holidays.
Love winter holidays. Christmas is a favorite partly because it gives me license to be extravagant, to celebrate a winter world with sparkle, color and cheer.
And now speaking of cheer, here is a vivid pink Christmas Theater!
Not a traditional wintery color, but festive nonetheless.
Here is the theater, stage set and ready for whatever story one would like to tell.


I took them apart and cut and glued the papers I chose in place. The papers I used were all Bo Bunny from the Christmas Village Collection or the Double Dot Vintage line in Pink Punch.
I inked the edges of all the pieces and also inked in some 'folds' in the curtains by smoodging (my own word) ink on with my finger and a Qtip in places where I imagined shadows would be.

I painted white snowflakes from both the Snowflake Shape Set and the Snowflake Shape Set Minis.
I did the same with the Pine Tree Shape Set.
Set them aside to dry.
I cut houses from the Christmas Village paper, added glitter to all the wee lights (I used lots of different Stickles glitter for that and White Lace Stickles for the snowy window ledges) and let them dry.
After they dried, I cut and scored pieces of card stock and glued them on the back of each house.

I glued in all my bits, and added some extra details (cut and glittered) from the Christmas Village paper.


SUPPLIES
Stage
Snowflake Shape Set
Snowflake Shape Set Minis.
Pine Tree Shape Set
Additional supplies
Bo Bunny Village Christmas Scrapbook Paper
Bo Bunny Double Dot Pink Punch Vintage
Stickles glitter glue in Frosted Lace, Diamond, Lime Green, Orange Peel, Christmas Red and Glam Pink
White Acrylic paint
White Dresden Trim (you can get it HERE)
Bottle Brush Trees are available at lots of craft stores.
Monday, November 5, 2018
My Happy Place
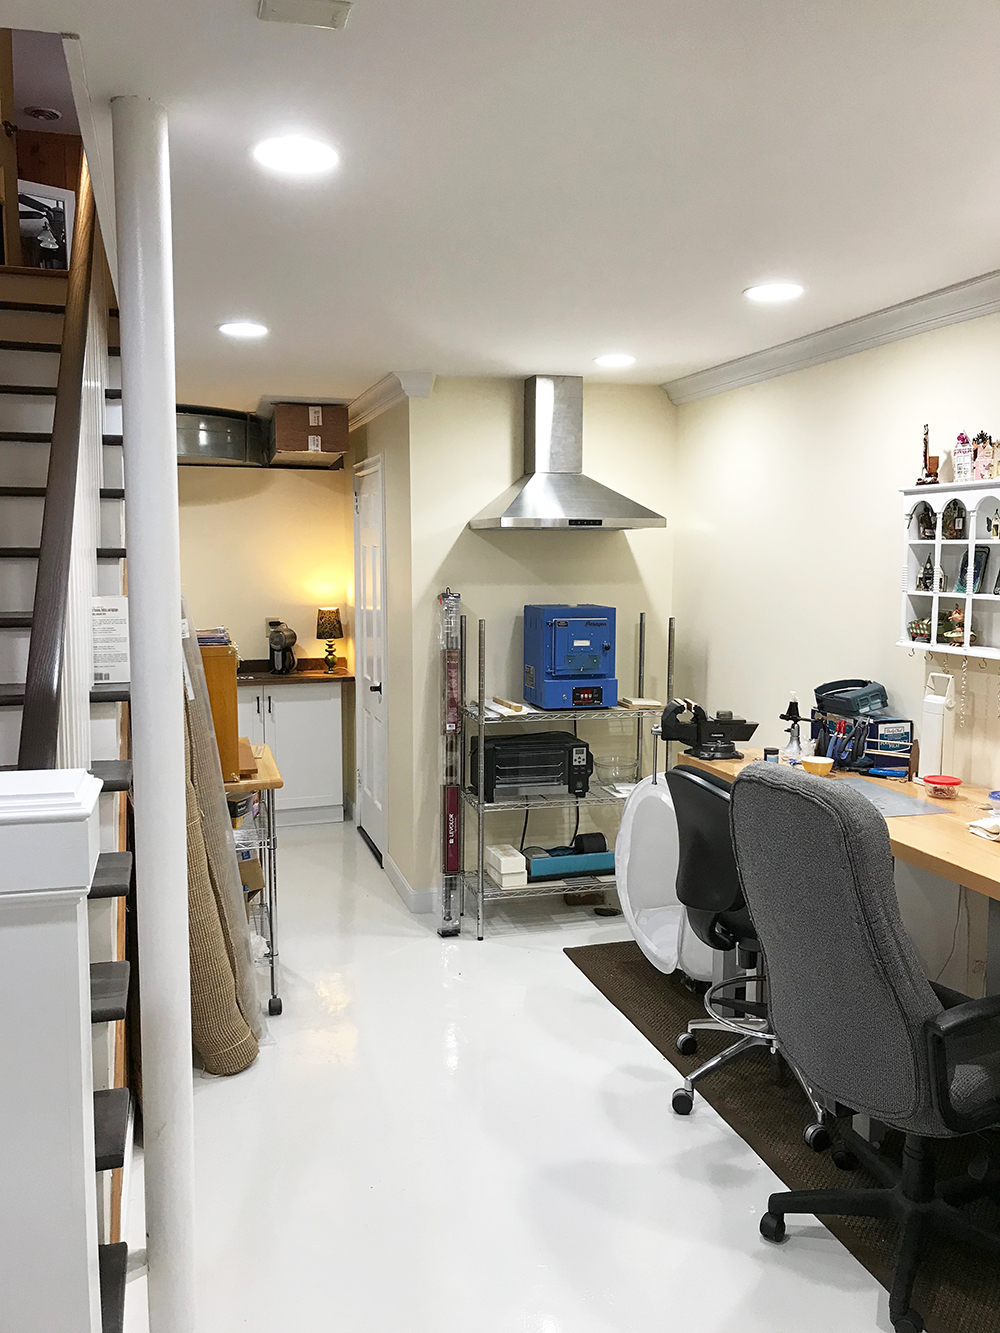
Just a quick update on the studio.
I am moving in and have actually set up my work table and desk as well as some of the rest of the furniture. What you don't see is the HUGE amount of boxes stacked up on the wall where the built-in is. We'll save that for another day!
 Hope everyone is having a great day. Thank you so much for dropping in!
I am moving in and have actually set up my work table and desk as well as some of the rest of the furniture. What you don't see is the HUGE amount of boxes stacked up on the wall where the built-in is. We'll save that for another day!

Tuesday, October 16, 2018
A Quartet of house Ornaments
As I continue to indulge my obsession for houses, here is a set of four wee houses with lots of personality. Made from the Simple House Ornaments,
these sturdy little things are one of my favorite items on the Gypsy
Soul Laser Cuts site. They are made from HEAVY chipboard and you can do
just about anything with them.
Like this, for example:
 They
come in sets of two, so you will need two sets for a little street like
this one, or make as many as you like and give them as individual
gifts.
They
come in sets of two, so you will need two sets for a little street like
this one, or make as many as you like and give them as individual
gifts.
 You can let your imagination go wild and make each one different or stick to a theme or color.
The sky is the limit......
 I began here.
 I cut my chosen papers, glued them on to the houses, front and back and then inked the edges with Brilliance Rocket Red Gold.
 I shingled the house roof below with Pointed Shingles Half Scale. There is a quick tutorial on how I do shingles HERE.
 I painted a few of the windows from the House Ornament Window Trims black.
 After
playing around with where I wanted windows on a couple of the houses, I
decided it would be fun to have some images of the outdoors inside of
the house. These tiny images below are from one little scrap of collage
sheet I found in my box of scraps I keep all the tiny paper bits I don't
discard.
After
playing around with where I wanted windows on a couple of the houses, I
decided it would be fun to have some images of the outdoors inside of
the house. These tiny images below are from one little scrap of collage
sheet I found in my box of scraps I keep all the tiny paper bits I don't
discard.
I cut the image in thirds and glued them to the back of each little tiny window. I glued the windows on a piece of black-painted scrap chipboard edged in Rocket Red Gold and attached the whole thing to the house.
After it dried, I trimmed it all around with black zig-zag Dresden trim. (you can get it HERE)
 I
also found the eye in my scrap box and zipped it up color-wise with a
little copic marker and glued it the same way as I did the tiny window
images. The Frame around the eye is from the Miniature Bookplates Shape Set.
I
also found the eye in my scrap box and zipped it up color-wise with a
little copic marker and glued it the same way as I did the tiny window
images. The Frame around the eye is from the Miniature Bookplates Shape Set.
I worked on the key images for each house and had those all glued on before I added the extras like more Dresden trim, brass findings and little white dots. The brass bee sits on another scrap of chipboard I saved from the Bookplates Set.
 For
the image below, I used scraps again and literally tore the edges off
of them to create the three layers of hills and a tree to give my
floating lady a soft place to land. I outlined each of the pieces on
their top edges after I glued them on the house.
For
the image below, I used scraps again and literally tore the edges off
of them to create the three layers of hills and a tree to give my
floating lady a soft place to land. I outlined each of the pieces on
their top edges after I glued them on the house.
 I used foam tape to attach the tiny, tiny little lady to the house (after careful consideration about her placement.
I wrapped some black thread around a brass hand finding, careful to leave some extra length, glued it in place from the back and attached the hand to the house. after it dried in place, I glued the thread to the my lady's hand and trimmed off the extra with a small sharp pair of scissors.
I added lots of dots to everything as the last detail in every piece.
I like to use either white acrylic paint or a Sharpie white poster paint marker for dots.
 I also used the white Sharpie to draw the spokes on the bicycle wheels in the picture below.
 A cute way to display the houses if you don't want to hang them is with the ATC Stand.

Thank you for stopping by!
SUPPLIES
Simple House Ornaments
Pointed Shingles Half Scale
House Ornament Window Trims
Miniature Bookplates Shape Set
ATC Stand
Additional Supplies:
Dresden Trim
Sharpie White Poster Paint Marker (don't get the oil paint one....you'll be waiting forever
for it to dry)
Various brass findings
Scrap images saved from collage sheets
Papers used on the houses from: Graphic 45, We R Memory Keepers, Basic Grey and MME.
Silk flower
Dresden Trim, clock and some cool brass findings you can get from Alpha Stamps.
Like this, for example:


The sky is the limit......


I cut the image in thirds and glued them to the back of each little tiny window. I glued the windows on a piece of black-painted scrap chipboard edged in Rocket Red Gold and attached the whole thing to the house.
After it dried, I trimmed it all around with black zig-zag Dresden trim. (you can get it HERE)

I worked on the key images for each house and had those all glued on before I added the extras like more Dresden trim, brass findings and little white dots. The brass bee sits on another scrap of chipboard I saved from the Bookplates Set.


I wrapped some black thread around a brass hand finding, careful to leave some extra length, glued it in place from the back and attached the hand to the house. after it dried in place, I glued the thread to the my lady's hand and trimmed off the extra with a small sharp pair of scissors.
I added lots of dots to everything as the last detail in every piece.
I like to use either white acrylic paint or a Sharpie white poster paint marker for dots.


Thank you for stopping by!
SUPPLIES
Simple House Ornaments
Pointed Shingles Half Scale
House Ornament Window Trims
Miniature Bookplates Shape Set
ATC Stand
Additional Supplies:
Dresden Trim
Sharpie White Poster Paint Marker (don't get the oil paint one....you'll be waiting forever
for it to dry)
Various brass findings
Scrap images saved from collage sheets
Papers used on the houses from: Graphic 45, We R Memory Keepers, Basic Grey and MME.
Silk flower
Dresden Trim, clock and some cool brass findings you can get from Alpha Stamps.
Subscribe to:
Posts (Atom)