Showing posts with label Valentine's Day. Show all posts

Saturday, January 12, 2019

My Chocolate Valentine

Yes, Valentine's Day will be here before you know it. It's always been a holiday that catches me by surprise. Fortunately for moi, my husband knows exactly what to get me and it's the same every year and it never gets old.
A book and a box of chocolates.
It's the best.
I look forward to it every year.
If he doesn't get it for me this year (he will) I will get it for myself!

So when the wonderful Alpha Stamps sent me the Victorian Ephemera Kit-January and that luscious chocolate colored Dresden trim spilled out, well, that was it for me. It had to be a snarky chocolate valentine.
I began with the Victorian Ephemera Kit-January.
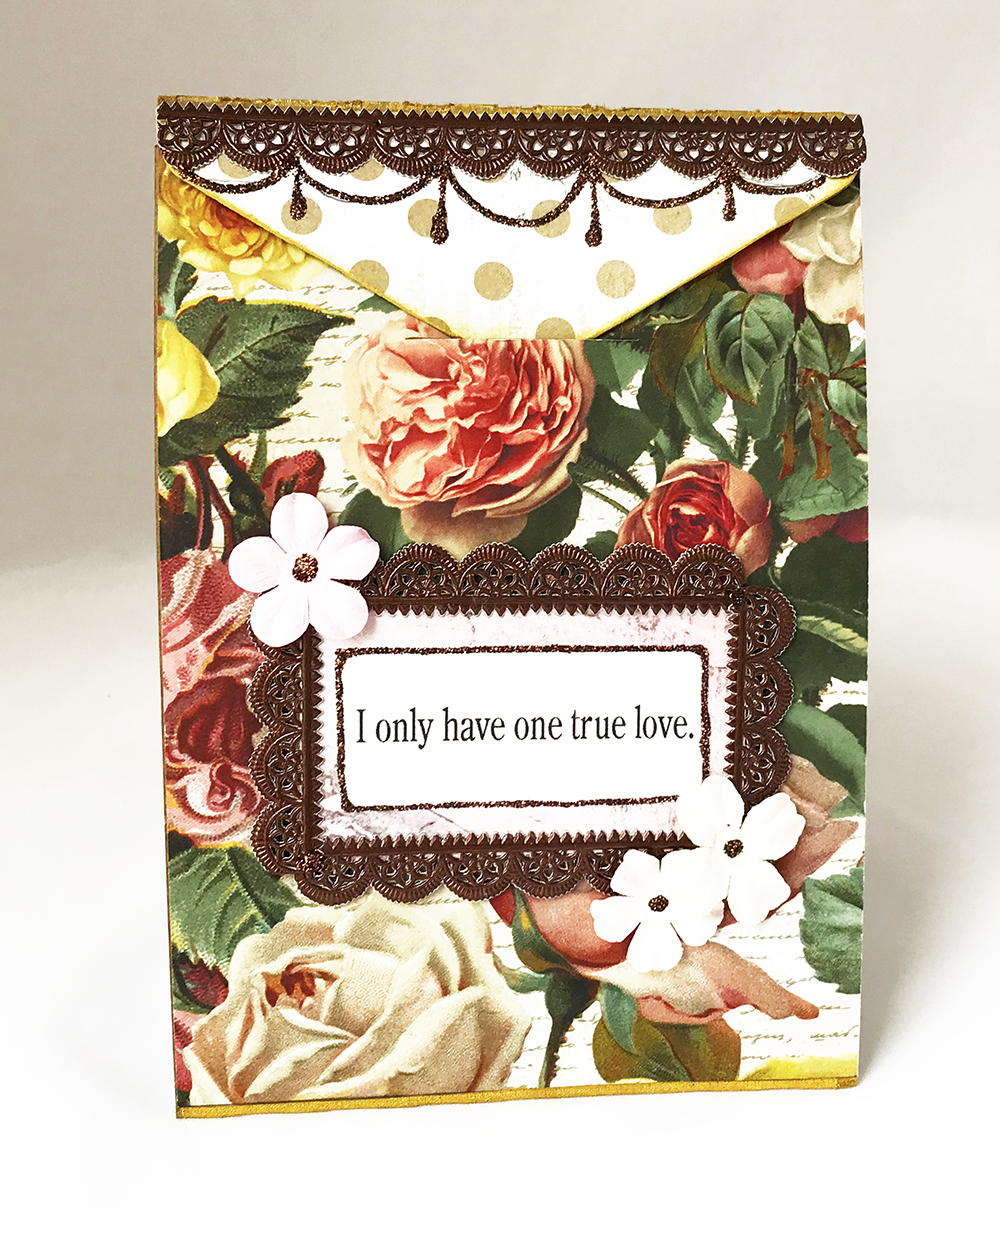
I used the Arched Tent Card Frame as a template to cut all my papers and set them aside for a moment.
I reinforced the bendy fold in the tent card (on one side) with some lined hinging tape and inked it gold.
I glued in the surface papers, cut a bit of scrap chipboard into two rectangles  and glued background paper on to them as well for the phrases I printed off of my printer.
After all of that dried, I glued in my image to the arched frame and added some cut out flowers from the scrapbook paper, added Stickles glitter to my chocolate lovin' lady and set it aside to dry.
I added the gorgeous Dresden trim to edges and anywhere else it looked good. Honestly, I just kept going with it until I ran out!
Then I penciled in where I wanted to add a garland of Stickles......
And step by step.....
Piped in on.
After you do one side of the tent card, set it aside and let it dry for an hour or so.
I did the outside of the tent card first and then glued in the arch top piece inside and embellished away with the Stickles.
(The phrases I glued and embellished separately, then glued them onto the tent card before I added the final touches of glitter.)
I also used a couple of Copic markers to pump up the color in her hair and put some roses in her cheeks.
A couple of pretty little paper flowers on the front and a couple drops of glitter in the centers and it's all good to go!
Have a chocolatey Valentine's Day!
For a link to all the supplies used in this piece, click HERE.

SUPPLIES:
Arched Tent Card Frame
Scrap Studio Roses & Gritty Scrapbook Paper
Victorian Ephemera Kit (all the papers and the Chocolate Dresden)
Caroline Otero Collage Sheet
Cinnamon Stickles
Christmas Red Stickles
Diamond Stickles
White acrylic paint
Linen Hinging Tape
Vintage Shades Paper Flowers-Orchid Pink (substitution suggestion)
Brilliance Galaxy Gold Ink Pad


Thank you for stopping by!


Tuesday, January 16, 2018

I will Always Love You.....

Somethings in life never change. Like a sweet tooth. Chances are, if you started out with a sweet tooth, you'll always have one.
Some of us enjoy our penchant for a decadence a little more robustly than others.
Take me for example...I am never happier than when I have a good book and a box of chocolates.
And maybe a bubble bath.
And possibly a glass of champagne.
And don't forget the massage.

Here's a sweet little valentine for all of us hedonists.
 I started out with a coat of gesso on both pieces of the Reliquary-Arch Top and then painted it white.
You can also see in the picture above the image I chose for my inspiration. She is from a painting called 'La Simplicite' by Jean-Baptiste Greuze (1759) and I've used her a couple of times with a similar theme, mainly because I like her expression, but also because her eyes are looking in the direction I like to place things.
The little cake came from a scrap from a collage sheet by Sandy Gordon.
I cut my background paper (I changed my mind and used green but didn't photograph it) and glued it in place. Notice I didn't cut it to the edge of the back piece. I cut it so that the paper edge would be hidden by the front piece, but small enough so that the paper edge wouldn't show when both back and front are glued together.
Do not glue the front and back together yet.
I cut my image being mindful of edges showing, place it where I liked it and then glued it in, checking to see if the top fits well and no bits that aren't supposed to show are sticking out. Then I glued the top piece of the reliquary on, making sure all the edges of the top and the bottom line up.
I glued my little cake in........
And then started adding the details....like little pink and white dots and sparkly bits. A pretty flower and of course, glitter!
The bottom piece with the sentiment (which was written in Illustrator and then printed on cardstock) is from the Stackable Labels Shape Set which I painted pink, added the phrase, glitter and a couple of flower petals and glued it on the bottom of the reliquary.
I doubled over a white ribbon and glued it on the back to use as a hanger and then glued a pretty flower image on top to cover up the raw edges of the ribbon. I added some pink paint and glitter to the front of the ribbon for a little extra bit of charming detail.

Happy Valentine's Day!

Supply List:
Reliquary-Arch Top
Stackable Labels Shape Set

Additional Supplies
Wite paint Pink Paint
Gesso
Stickles Glitter Glue (Diamond)
Silk Flower
1 Inch White Ribbon
Collage Image (cake)
Aleene's Fast Grab Tacky Glue
Pink Heart Glitter

Thank you very much for visiting!
Lora Mahaffey for Gypsy Soul Laser Cuts