I love this new 6x4 Specimen Box!
It's a great size and you can choose to put in as many of the inserts as you choose. Nice, flexible design.
In my bug specimens theme, I chose to leave out the insert on the far right, so I could place some bigger critters in there.
Here's where I started:
I assembled the box frame and painted the sides (on the inside only), the top front edges and the inserts.
I cut paper to fit the inside back and all of the outside of the box. I glued in the papers ...
fitted
and glued in the inserts, let them dry and then gave the whole thing a
coat of matte medium and then a coat of Quinac gold, wiping most of it
away with a damp paper towel, but leaving the 'goo' in the cracks and
crannies to give the box an aged looked.
I also painted the Layered Flouishes Aria and assembled them for adding to the box later.
I then fussy cut my insects with a scalpel, glued them each on a tiny cork (you can get them HERE) and then glued them into the box.
After
that was dry, I glued the flourishes on to the front of the box, added a
few tiny brass stamped flowers et voila! A pretty little specimen box.
A fun project and most enjoyable.
Supplies:
6x4 Specimen Box
Layered Flouishes Aria
Faux Metal Number Plates
Stamperia 'Spring Botanic' scrapbook papers
Acrylic paints
Stamped brass flowers
Thank you for visiting!
Tuesday, July 16, 2019
Tuesday, July 2, 2019
A Sugar Skull House for Halloween
I know it's only June, but I am all about Halloween lately, and most
everybody knows how much I love doing houses, so here is a Sugar Skull in a house.
With bats.
And some scary tree bits.
Here it is lit up with glowing eyes.
And unlit, but still looks pretty cool in the daylight.
I started out with the Mini House Room Box 4x4 Open. I took away the attic floor to make room for the Sugar Skull 1.
I laid the skull on top of the large center piece and marked where I wanted to drill holes for my glowing eyes.
I drilled the holes to the size of the tea light flames, NOT the whole tea light. I'm going to glue the body of the tea light in place on the back of the house, but we'll do that in a later step. For now, I dry fit the tea light to make sure the flame fits through the holes I drilled.
I cut papers for the main body of the house, back, front and sides (outside only). I glued the sides and the roof on, painted the inside of the house walls, ceiling and floor and then glued all the papers on.
Next, I painted almost everything else black. Sugar Skull, Creepy Tree (I used bits and pieces of the 8-inch Creepy Tree and the 5-inch Creepy Tree) Chipboard Bats Set (you can get them HERE) and the ridge ornament, which is the Chipboard Fleur Border. (Get it HERE)
I shingled the roof and painted most of it brown, adding a few rows of black to accent the pattern. I glued the ridge ornament on as well. You can see some of the roof and ridge in the picture below. I apologize for not getting a WIP shot. I was all into the groove and forgot.
when all the glue and paint dried, I added the trees and the bats on the back. I used black double stick foam tape to stick the trees on and mounted the bats on wires and then glued them on to the tree and added some black roses to pretty up the joined bits. I got the roses from Alpha Stamps, the same place I got the bats and the ridge ornament and the Dresden trim, which I glued on to the base of the ridge ornament and the gable edge of the house front.
Last but not least, I added some corks to the sugar skull and glued into place and turned on the lights!
That's a good start on Halloween!
SUPPLIES:
Mini House Room Box 4x4 Open
Sugar Skull 1
Creepy Tree (8inch)
Creepy Tree 5inch
Chipboard Shingles-Pointed
From Alpha Stamps:
Chipboard Bat Set
Black Zig Zag Dresden Borders
Chipboard Fleur Border
Additional:
BoBunny Double Dot Vintage Chiffon
Graphic 45 Olde Curiosity Shoppe Genuine Article
Two tea lights
Black Paint
Thank you for stopping by!
With bats.
And some scary tree bits.
Here it is lit up with glowing eyes.
And unlit, but still looks pretty cool in the daylight.
I started out with the Mini House Room Box 4x4 Open. I took away the attic floor to make room for the Sugar Skull 1.
I laid the skull on top of the large center piece and marked where I wanted to drill holes for my glowing eyes.
I drilled the holes to the size of the tea light flames, NOT the whole tea light. I'm going to glue the body of the tea light in place on the back of the house, but we'll do that in a later step. For now, I dry fit the tea light to make sure the flame fits through the holes I drilled.
I cut papers for the main body of the house, back, front and sides (outside only). I glued the sides and the roof on, painted the inside of the house walls, ceiling and floor and then glued all the papers on.
Next, I painted almost everything else black. Sugar Skull, Creepy Tree (I used bits and pieces of the 8-inch Creepy Tree and the 5-inch Creepy Tree) Chipboard Bats Set (you can get them HERE) and the ridge ornament, which is the Chipboard Fleur Border. (Get it HERE)
I shingled the roof and painted most of it brown, adding a few rows of black to accent the pattern. I glued the ridge ornament on as well. You can see some of the roof and ridge in the picture below. I apologize for not getting a WIP shot. I was all into the groove and forgot.
when all the glue and paint dried, I added the trees and the bats on the back. I used black double stick foam tape to stick the trees on and mounted the bats on wires and then glued them on to the tree and added some black roses to pretty up the joined bits. I got the roses from Alpha Stamps, the same place I got the bats and the ridge ornament and the Dresden trim, which I glued on to the base of the ridge ornament and the gable edge of the house front.
Last but not least, I added some corks to the sugar skull and glued into place and turned on the lights!
That's a good start on Halloween!
SUPPLIES:
Mini House Room Box 4x4 Open
Sugar Skull 1
Creepy Tree (8inch)
Creepy Tree 5inch
Chipboard Shingles-Pointed
From Alpha Stamps:
Chipboard Bat Set
Black Zig Zag Dresden Borders
Chipboard Fleur Border
Additional:
BoBunny Double Dot Vintage Chiffon
Graphic 45 Olde Curiosity Shoppe Genuine Article
Two tea lights
Black Paint
Thank you for stopping by!
Labels:
Alpha Stamps,
Bats,
Cackle and Hoot,
Creepy Tree,
Gypsy Soul Laser Cuts,
Halloween,
Haunted House,
Sugar Skull
Friday, June 28, 2019
Thursday, June 27, 2019
Little Flower House
I was playing around with stamped brass flowers and enamels and this is what happened....
I kind of like it. It's about 6 inches tall.
Tuesday, June 18, 2019
The Horologium, a traveling clock
This is the Horologium.
Ever seen the movie Time Bandits?
I haven't worked out why yet, but I was thinking a lot about that movie whilst making this and this is what came out of that.
Maybe it's because the props were gorgeous and full of odd details and functions.
Horologium is the Latin word for clock, which seems kind of Time Bandits-ish. And this clock is pretty fancy and has an air of consciousness about it, so I felt it needed a smart name.
Clocks have moving parts, so it's a natural progression of fanciful thought to think they are intelligent. Lots of stories out there about clocks.
And I like making objects that appear to be a little bit (or a lot) sentient.
Here she is with her little traveling eye at the foot of the clock. She gets around.
Here is where I began..
I assembled and gessoed the inside of the clock. I did not glue the facade on-that comes later.
I made a template to build my stairs, then used it on some scrap thin chipboard and then cut them out. I actually made four staircases, but you can't really see the one behind the clock unless you look closely.
To assemble the stairs, I cut a piece of chipboard about 1/4 in wide and used that as the underside of the stairway. I glued both of the stair jacks (the zig zag bits) to either side of the chipboard making sure as best I could, that they were even with each other and straight.
I cut pieces of scrapbook paper approx. 1/4 in wide and glued them to the riser part of the stairs. I trimmed them to fit with a pair of scissors. After they dried, i did the treads and again, cut them with a pair of scissors to fit.
After they all dried, I dry-fitted the stairs into the clock and made adjustments as needed to get a good fit. I did not glue the stairs in until I had the background of the inside of the clock complete.
I decided that I wanted a piece on the inside of the clock that repeated the shape of the arched top of the clock, so i drew a template and cut one out of chipboard.
I painted it and put some lifts on the back to make it stand out a bit from the back. My intention was to put one of the staircases behind it to make it look deeper. After some fiddling around, I realized that the third course of stairs that need to fit behind the arch was too wide, so I ended up cutting the underside in half in order to get all the pieces to fit into the clock. You can see in the picture below that the third course (the one on the top) is much narrower than the other two.
Everything got a coat of brown paint and some detailing with gold paint, was dry-fitted into the clock once again and set aside.
SUPPLIES:
Eleven inch Grandfather Clock
Miniature Bookplates Shape Set
Simple House Ornament
Faux Metal Number Plates
Additional supplies:
From Alpha Stamps:
Black Zig Zag Dresden Borders
Codex Leonardo 12x12 Paper Pad
A lot of the bead caps and metal findings I also got from Alpha Stamps HERE
and HERE
Acrylic Paint
Matte Medium (I use Liquitex)
Wire
NOTE: The piece with the eye on it is a Simple House Ornament with about an inch and a half cut off the bottom and a tiny wooden block glued on the back!
Ever seen the movie Time Bandits?
I haven't worked out why yet, but I was thinking a lot about that movie whilst making this and this is what came out of that.
Maybe it's because the props were gorgeous and full of odd details and functions.
Horologium is the Latin word for clock, which seems kind of Time Bandits-ish. And this clock is pretty fancy and has an air of consciousness about it, so I felt it needed a smart name.
Clocks have moving parts, so it's a natural progression of fanciful thought to think they are intelligent. Lots of stories out there about clocks.
And I like making objects that appear to be a little bit (or a lot) sentient.
Here she is with her little traveling eye at the foot of the clock. She gets around.
Here is where I began..
I assembled and gessoed the inside of the clock. I did not glue the facade on-that comes later.
I made a template to build my stairs, then used it on some scrap thin chipboard and then cut them out. I actually made four staircases, but you can't really see the one behind the clock unless you look closely.
To assemble the stairs, I cut a piece of chipboard about 1/4 in wide and used that as the underside of the stairway. I glued both of the stair jacks (the zig zag bits) to either side of the chipboard making sure as best I could, that they were even with each other and straight.
I cut pieces of scrapbook paper approx. 1/4 in wide and glued them to the riser part of the stairs. I trimmed them to fit with a pair of scissors. After they dried, i did the treads and again, cut them with a pair of scissors to fit.
After they all dried, I dry-fitted the stairs into the clock and made adjustments as needed to get a good fit. I did not glue the stairs in until I had the background of the inside of the clock complete.
I decided that I wanted a piece on the inside of the clock that repeated the shape of the arched top of the clock, so i drew a template and cut one out of chipboard.
I painted it and put some lifts on the back to make it stand out a bit from the back. My intention was to put one of the staircases behind it to make it look deeper. After some fiddling around, I realized that the third course of stairs that need to fit behind the arch was too wide, so I ended up cutting the underside in half in order to get all the pieces to fit into the clock. You can see in the picture below that the third course (the one on the top) is much narrower than the other two.
Everything got a coat of brown paint and some detailing with gold paint, was dry-fitted into the clock once again and set aside.
I cut the paper for the facade of the clock using the piece as a template.
I fitted and then glued a piece of a rice paper image to the inside sections of the clock.
The paper I used throughout the piece, including the rice paper is from Ciao Bella's Codex Leonardo.
I
gave it a good coating of matte medium, let it dry and began arranging
some clock parts over the paper for more detail, dry-fitting my arch and
staircases to make sure I wasn't interfering with the space I needed in
the final gluing.
I
used a lot of metal stampings in this piece. I decided to change the
detailing on the stairs, ended up repainting them and adding little tiny
flowers on the jacks. I like it!
After
adding the deatils I wanted to the inside of the clock, i finally glued
in the stairs and glued the facade on. I painted and added lots of
details, like Dresden trim and the little birdcage on the right.
Little flower lanterns made from bead caps and wire,
lots of gold dots,
And hand painted details.
Thank you for stopping by!SUPPLIES:
Eleven inch Grandfather Clock
Miniature Bookplates Shape Set
Simple House Ornament
Faux Metal Number Plates
Additional supplies:
From Alpha Stamps:
Black Zig Zag Dresden Borders
Codex Leonardo 12x12 Paper Pad
A lot of the bead caps and metal findings I also got from Alpha Stamps HERE
and HERE
Acrylic Paint
Matte Medium (I use Liquitex)
Wire
NOTE: The piece with the eye on it is a Simple House Ornament with about an inch and a half cut off the bottom and a tiny wooden block glued on the back!
Labels:
clock,
Grandfather clock,
Gypsy Soul Laser Cuts,
Latin,
Lora Mahaffey,
Time Bandits,
time travel
Monday, June 3, 2019
Teeny Tiny Little House
I love this wee house. It is less than an inch tall and the base is
about 3/4 of an inch square. It was so much fun to play with and I loved
it so much, this house has become a two part project as I thought up
about eleventy things to do with it while putting it together. Lora here
for Gypsy Soul Laser Cuts!
Just give you a bit of scale...
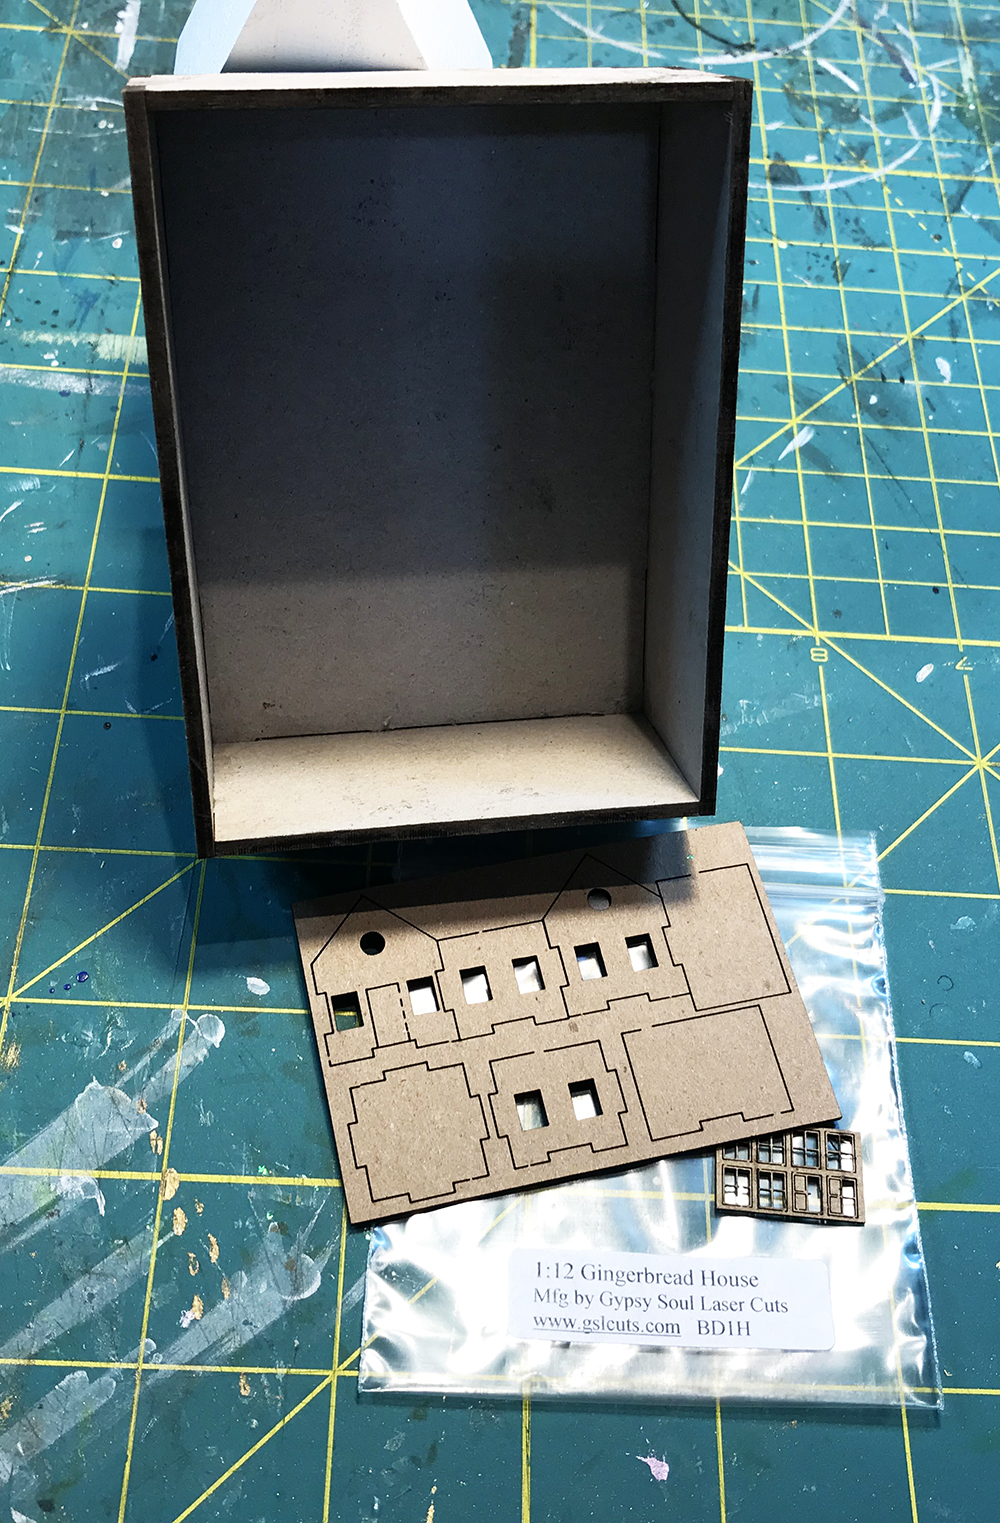
Here is where I started:
I glued the house together, but left the roof off as I wanted to paint the interior white.
I then gave the outside of the house a preliminary coat of yellow.
I glued the roof on....
And chose the Tiny Pointed Shingles to put on the roof.
I started from the bottom and worked my way up the top, staggering the pieces so that the points form a diamond shape, not lined up.
After one side was done, I drew a line with a marker as a guide to where I wanted the shingle overhang to be, and cut them with a pair of sharp scissors.
I did the same thing to the other side, then added a ridge decoration. The little piece was from the shingles I used...it's the strip between the shingle pieces and is a little bit thinner. Perfect for a ridge vent!
I gave the entire piece a coat of Titan Buff.
And painted the roof in chocolate brown...
and red.
I added details with a fine brush, like lintels over the windows and doors and a threshold on the bottom of the doorway. And tiny little flowers and vines on the window sills. and a small tree in the corner.
I used a round #3 brush, pretty small and kind of dotted and blobbed the floral details as the house is so small painting a detailed flower wouldn't be noticed very well.
A very fun project and part of a story yet to come!
Thank you for stopping by!
SUPPLIES:
1:12 Gingerbread House
Tiny Shingles Pointed
Acrylic Paint
Just give you a bit of scale...
Here is where I started:
I glued the house together, but left the roof off as I wanted to paint the interior white.
I then gave the outside of the house a preliminary coat of yellow.
I glued the roof on....
And chose the Tiny Pointed Shingles to put on the roof.
I started from the bottom and worked my way up the top, staggering the pieces so that the points form a diamond shape, not lined up.
After one side was done, I drew a line with a marker as a guide to where I wanted the shingle overhang to be, and cut them with a pair of sharp scissors.
I did the same thing to the other side, then added a ridge decoration. The little piece was from the shingles I used...it's the strip between the shingle pieces and is a little bit thinner. Perfect for a ridge vent!
I gave the entire piece a coat of Titan Buff.
And painted the roof in chocolate brown...
and red.
I added details with a fine brush, like lintels over the windows and doors and a threshold on the bottom of the doorway. And tiny little flowers and vines on the window sills. and a small tree in the corner.
I used a round #3 brush, pretty small and kind of dotted and blobbed the floral details as the house is so small painting a detailed flower wouldn't be noticed very well.
A very fun project and part of a story yet to come!
Thank you for stopping by!
SUPPLIES:
1:12 Gingerbread House
Tiny Shingles Pointed
Acrylic Paint
Subscribe to:
Posts (Atom)