Saturday, March 24, 2018

Easter Bunny Shadow Box and a Little Blue Bunny.

Lora here for the amazing Alpha Stamps! Easter is around the corner, hunting for Easter eggs, dressing up in Easter bonnets, cellophane covered baskets full of treats,  eating waaaay too many egg-shaped chocolate covered malt balls and last but certainly not least, eagg decorating. It sure is hard to find the time nowadays. BUT, there is someone who always has time.
Yep. Our favorite rabbit (no, not bugs) the Easter Bunny!
And look! Here he is decorating his little fluffy tale into a fuzzy frenzy.


He's even got a little wee peep fan-girling all over him as he works. Stick around, you might learn something, kid.


A view of the front cover....


I began with the Mini Shadowbox-3.5x5.5. I glued it together......
I measured and cut all my papers for the piece, inside and out.
I glued them all into place EXCEPT for the piece on the inside of the door.
I measured and cut a piece of linen hinging tape and put that in place, making sure it was even and the lid and box were lined up straight. Make sure you leave enough space between the lid and the box to allow it to close properly. Adjust the tape as needed than apply pressure to afix the tape.
Now glue in the paper for the inside of the door.
The main image used for the inside of the shadowbox is from the Bunnies and Violets Collage Sheet. I fancied him up with lots of glittah!
Here is what the inside of the shadowbox looked like before I added the images and final details...
You can see the progression of steps, from gluing in the Sheet Moss to adding the white-painted spool used to rest the Miniature Wicker Basket on.
I added little flowers to the outside of the basket and glitter centers to the flowers, a Blue Speckled Plastic Egg got a light dusting of glitter as well.
Flowers went on the inside cover as well to hide the back of the banner that is glued on the outside cover.
It's all so dang springy and Easter-ish.
I may have to do something for Halloween now, just because I feel the need to counter balance the pastel explosion.
 
But wait!!!
Just when you thought the cuteness was too much to bear, here is something that will throw you into a sweetness overload..
How about a little blue bunny? Hmmm?
Dang it.
I couldn't help myself. The little guy was irresistible.
Same steps apply for putting the box together and doing the papers.
The difference here is that I glued the top on, so it does not open up. Here's what I did on the inside...
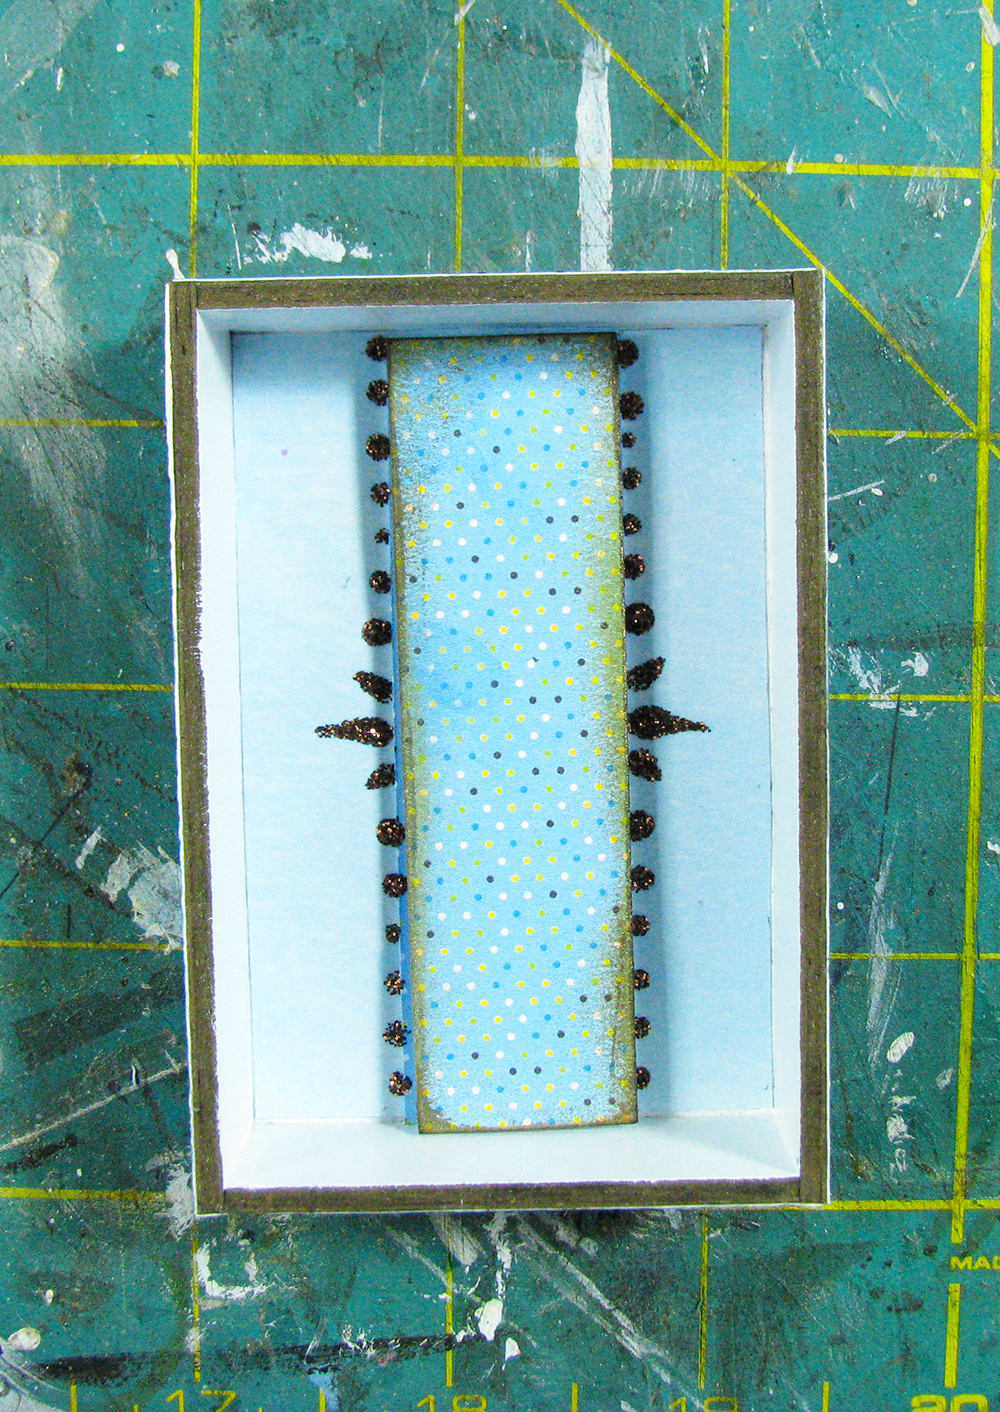
I glued a strip of blue spotty paper down the center of the box, piped some Cinnamon Stickles around the edges.
I cut another piece of blue spotty paper and inked up the edges, adding wings to the cute bunny (from the Happy Easter Collage Sheet)...
I glue a strip of cardboard on the center of the piped strip of paper.
Then I glued in the inked piece of blue paper. I like the little bit of depth and shadow it creates.
Then the bunny was glued in and the cover glued on. More stickles was piped on the front and a pretty flower from the Vintage Velvet Hydrangea Picks was attached.
Cuteness happened!
For a complete link to the list of supplies used, click HERE

SUPPLIES LISTS:
Easter Shadowbox:

Mini Shadowbox-3.5x5.5
Easter Covers for Mini Shadowbox (large rabbit)
Bunnies and Violets Collage Sheet
Happy Easter Collage Sheet
Stickles-Firefly, Waterfall, Lavender and Pineapple
6x6 Cottontail Paper Pad
Double Dot Powder Blue Scrapbook Paper
Mini Fuzzy Yellow Easter Chicks
Miniature Wicker Basket
Wood Mini Spools (substitute)
Blue Speckled Plastic Eggs
8mm White Pearls (flower centers on top of box)
Sheet Moss

Additional supplies
various paper and silk flowers
vintage photo stamp pad
linen hinging tape


Little Blue Bunny:
Mini Shadowbox-2x3
Easter Covers for Mini Shadowboxes (small egg)
Happy Easter Collage Sheet
Just Wings Collage Sheet
Stickles - Cinnamon
6x6 Cottontail Paper Pad
Vintage Photo Ink Pad
Vintage Velvet Hydrangea Picks-Sage


Thank you for dropping by!


Tuesday, March 20, 2018

Dancing Hares

Hello all, Lora here taking my turn for Gypsy Soul Laser Cuts. It's nearly time for Easter and that means spring is on it's way.
Though I will miss winter, (my favorite season) I do love change and look forward to the freshness of Spring.
I sure have made a lot of Easter arts and crafts over the years...lots of it is pretty frou-frou as there is so much about the holiday of Easter that is represented that way. I'm not a real 'fluffy' gal myself, but I admit to a deep and abiding love for chocolate and any celebration that includes it puts a big chocolate mustache smile on my face.
Another thing I love are hares. They are gorgeous creatures with improbably huge ears and big old back feet. You don't see them much, but they figure in a lot of fairy stories and mythology.
So here is my pared down, all - seasons offering of a few hares dancing for joy.
Hope they make you smile.
 This is probably the simplest project in the world, so it's probably the shortest tutorial as well, but here it is....
I started out with the Mini Shadowbox Set I used three of the boxes and set the other three aside for a future use.
I glued them together and painted the entire thing white, back, front and sides.
While I was painting, I also gave the Fleur Border (coming soon) a good coat of white paint.
I made a little sign that says 'Now is when we dance'.
I cut a chunk from the Fleur Border and glued my sign on it.
I used white Dresden trim around the outside edges, glued some flowery bits I cut from the Fleur Border at each corner.
I glued the 'Now is when we dance' sign top and center of the piece and after cutting out all my hares, arranged them the way I liked them and stuck them in using foam tape for extra dimension.
Super simple project but with a lot of effect, since its very contrast-y.
Does anybody catch the (loose) reference to Mike Meyers and SNL?  :-D
SUPPLIES:
Mini Shadowbox Set
Fleur Border (coming soon)

Additional supplies:
White acrylic paint
White Dresden Trim (from Alpha Stamps)
Dancing Bunnies (from Northern Whimsy Image)

Thank you for dropping by!

Sunday, March 18, 2018

Make and Take Class!

Make and Take class is on Friday, March 30th. Noon until 3pm at the Creative Arts Center. This month we are making a set of three Easter egg ornaments...so cute!
Please call the Reynolds Homestead to reserve a place as space is limited.
276-694-7181
Hope to see you there!

Tuesday, March 6, 2018

Easter Greetings from Mr. Bead, my favorite curmudgeon.

Ah, Mr. Bead. There's something about you my friend. You are so cranky, so dour, so disarmingly grumpy. You just make me smile.
I have made a couple of other 'Mr. Bead'....pieces in my earlier paper days and he has always stuck with me. I am probably a little off center myself, but there is something about putting this grumpy guy into scenarios where most people are happy and seeing his sour-puss face that makes me laugh.
Maybe deep down he is gooey melted chocolate like a foil wrapped Easter bunny left in the sun.
This is a pretty straight-forward project and fun to do. I bega n with the ATC Shrine Box.
I glued it together and used rubber bands to keep it fitting tightly whilst the glue dried.
I measured and cut my papers for both inside and out. You can see in the picture below Mr. Bead has been getting a trim as well
After gluing the papers on and letting them dry, I gave the edges of the box a sanding.....
and inked up the edges, making it looked a bit more finished and give it some aging.
It gets a bit wordy here as I lost a few pictures to wherever WiFi takes bits you really need-kind of like the dryer eating one of your favorite stripey socks.
Next time I will not click on 'remove duplicate images from device' when downloading project pics.

I made the wee bunting letters, the phrase 'Easter Greetings from Mr. Bead' and the balloon on Illustrator.
I cut out tiny triangles of scrap paper and glued the 'Happy Easter' letters on them and glued those to the pink scrap of fuzzy ribbon.
The white string is a piece of embroidery thread I used as the tail of the balloon.
I used a piece from the Stackable Labels Shape Set which I painted green and after it dried, I glued my Mr. Bead phrase onto it.
For the foot of the piece, I used a 1 Inch Wide Wooden Finial I got from Alpha Stamps,
I glued it to a washer and painted the whole thing green and then after everything else was assembled, glued it on the bottom of the box.
I glued some bunny ears I drew and cut out on to Mr. Bead and glued a piece of foam to the back of the card stock to make him sit forward in the box. The tulips were scrap from a bit of scrap book paper I used ages ago. I put more foam on the back of the tulips and glued those to Mr. Bead.
I think he likes flowers....
I added more of the tulip scrap on top of the box, and added some glitter to the bottom edge of it, around the 'Easter Greetings from Mr. Bead' plaque and a little on his bunny ears.
He just makes me smile, he's so cranky.
The bunting went on the back of the piece and I impulsively added a couple of silk flowers left from another project.
And there it is!
Maybe you know someone like Mr. Bead. If you do, give him and extra big smile.
By the way, there is a Mrs. Bead who is equally as humbuggy as her mister. I may have to do something with an Easter bonnet for her...........
SUPPLIES:
ATC Shrine Box
Stackable Labels Shape Set

Additional Supplies:
1 Inch Wide Wooden Finial (from Alpha Stamps)
Green paint
Bo Bunny Vintage Dot Scrap book paper in Pear and Pink
Silk flowers
Cabinet card image (scanned....I never use my originals)
Various scrap (for the tulip border)
Scrap bits of ribbon and string

Thank you very much for stopping by!


Tuesday, February 20, 2018

Fold Out Books.....Part One: Construction and Hinging

Hello all! Lora here with a special two-part post on making your own awesome fold-out books with one of my favorite things on the Gypsy Soul Laser Cuts site...
Arch Top House Silhouettes!
I love this little chipboard piece of joy.

There are so many wonderful things you can make with this. My favorite is, of course, fold-out books.
Yay, fold-out books!
I get a lot of questions about how to make them, so in the first installment of this blog post, I am going to show you how fun and simple the actual construction of the book is and the reasons I build them the way I do.
The Arch Top House Silhouettes come in a set of three, but I generally like making books with five to seven panels, so getting two, three or even four sets is a good idea...you can a make at least a couple different length books and have some options.
Here are a couple of examples......
A three panel:
And a seven panel:
And here is the start of a two panel in progress:
What I am going to demo for you now is a five panel Fairy Fold-Out Book.

I began with five of the Arch Top House Silhouettes panels. (I previously thought I'd do a seven panel book but changed my mind, hence the picture of seven pieces)
I used one of the panels as a template and drew around my chosen papers and cut them out.
A quick note on how I choose papers.....
If you notice in the two completed books above, there is a bit of symmetry going on with the paper choices. I tend to like my books with odd number panels which allows for a central panel that can either be a feature or can blend in with the rest of the book, depending on the subject.
I usually choose to make the center panel a different color the rest of the book. The outside panels are usually the same color (they can be different patterns but they 'read' the same color) and the next two in are usually the same color way as each other and so on. I think this creates a harmonious base or commonality that you can then create a bit of chaos on and everything still feels like it fits together. (More on this as we go further into composing the layout)

After the papers are cut out, I carefully lay out my plain panels on a grid, making sure the bottom edge of each one lines up with the other and that there is a space of about 1/4 inch between panels. This space allows you to fold the book easily and gives you some leeway for layering and stacking components and ephemera. If you are using very thick elements on every panel consider spacing the panels further apart.
 When I am sure everything is lined up, I measure out a piece of linen hinging tape You can get this on Amazon...I use Lineco) slightly shorter than the length of the book and gently lay it on as straight as possible, making sure the tape is centered between the straight edges of each panel. You can correct the alignment at this point because you haven't pressed the tape down yet. Adjust if necessary and press the tape down.
Now turn the book over and do the same thing again, making sure you get the tape to stick to the other piece as it goes between the panels. I sometimes use a little ruler to press it down into the sticky bit of the other tape.
Double hinging tape makes the book strong and keeps the paper you will put on the panels from peeling off the book with rough handling.

After the taping is done, I glue on my papers. I use a scoring tool that I lightly scrape across the top of the panel to evenly distribute the glue and then wipe the excess away with a paper towel. I have used any flat object to get glue to adhere...pencils, ruler edges...just make sure it is smooth or you will tear your paper! A brayer also works really well.
I also tear a paper towel into small squares...less waste and easier to deal with.
I let the panels dry and give everything a quick sanding. You don't have to do this, but I prefer to as I like the way the edges look and it takes away any excess paper from over cutting. Just make sure you don't sand your hinge.
I ink up the edges of my book panels...
 Now that you have the basic construction of your book done, the fun really begins!
NEXT POST: A wee bit on Color, Collage and Composition to make your book pull together.
Stay Tuned!


Saturday, February 17, 2018

Cupid Matchmaking Vampires?.......It must be Opera.

One of the things I love about opera is this; there is no story too outrageous, no plot too complicated, no hero or heroine too ridiculous for an opera.
Nothing that is over-the-top nutso is too much for opera.
Costumes, acting, sets. All are lavishness on steroids.
And I call that fabulous.
Not to mention the music can be dramatic, tender, heart wrenching, sublime, terrifying.....you understand what I mean if you love opera.
In this little piece I am poking a bit of fun at one of my favorite forms of theater.
But hey, I have actually seen crazy-er real live opera, (how about "Orpheus in the Underworld"  and the underwear factory scene) though technically an operetta, it serves as a fine example of completely outrageous silliness.
Here's to love triangles, giant egos and outrageous silliness!

Most of the supplies (all the fantastic ones) are from the super Alpha Stamps and for a complete list of supplies for this project click HERE.
I began with the Window Shadowbox for Punch and Judy Facades and the Shadowbox Riser for the Arch Top Theatre Facade.
After I assembled and glued the separate pieces, I cut the backdrop paper for the stage and I then glued both the pieces together.
The 'floor' of the stage was a bit too low for my purposes, so I added a lift by gluing up a couple pieces of scrap chipboard and then painted it white and aged it up with a little gold stamp ink. I glued it into the shadowbox.
I chose the Marionette Theatre Collage Sheet as the front of my stage and juiced up the color a bit with some colored pencils and Copic markers.
I punched up the color on the curtains and the pediment I added as well.
I also wanted the stage floor to extend out a little past the curtains, so I built a little extension by folding a narrow piece of flexible cardboard (just a scrap piece from the extensive pile-o-kaka that I don't throw away) the length of the stage and painting the underside black and the top white with gold inking.
At this point, I decided to change the paper inside the stage to Double Dot Vintage Shadow (the floral side) and added a little heart and coffin stage decor. I cut the heart from the flip side of the Shadow paper and the tiny coffin I made using a graph paper drawing as a template.
And a lot of patience trying to figure out the angles.
Geometry is not a strong point of mine.
I glued the heart coffin thingy to the back of the stage. I glued the stage extension to the facade and added all the Fancy Scalloped Gold Dresden Borders, the curtains and the pediment.
I played some music and swept the floor whilst waiting for glue to dry...........
I then glued the whole facade on to the shadowbox and started adding detail!
Like Stickles Black Diamond Glitter!
And Black Mini Paper Roses!
And...and..more glitter.
and, oh yeah...people!
And fangs for everybody! Hurrah!
And fun little talking bubbles. These talking bubbles and the 'Theatre Des Vampyres' sign I made on illustrator and printed out on card stock, then glued in place.
I painted a candlestick stand and a wooden disk, glued the candlestick stand on the disk upside down and added Dresden trim and Black Diamond Stickles, then glued it to the bottom of the shadowbox making sure it was centered.
Holding on to the dry stand, I then painted the entire back side of the piece black and voila!
Vampire Opera.
It's a good thing.

Again for a link to the wonderful Alpha Stamps
supply list, click HERE

Supplies:
Window Shadowbox For Punch & Judy Facade
Shadowbox Riser for Arch Top Theatre Facade
Arch Top Theatre Facade
Marionette Theatre Collage Sheet
Theatre Maecanique Collage Sheet
Pink Children's Theatre Collage Sheet (butterfly fairy)
Mini French Ballet Costumes Collage Sheet
Gatefold Square Shrine Curtains Collage Sheet
Double Dot Vintage Shadow Scrapbook Paper
Tiny Paper Roses-Red
Black Mini Paper Blooms
Stickles-Black Diamond
Stickles-Crystal
Fancy Scalloped Gold Dresden Borders
Candlestick Holder (turned upside down)

Additional

Black Acrylic Paint
Wooden Disk (underneath the Candlestick Holder)
Colored Pencils
Copic Markers
White Poster Paint Marker-Fine (fangs)

Thank you for dropping by.