Sunday, March 29, 2015

Odd and Flora

Two altered art dolls inspired by Mary Jane Chadbourne's work. Her workshop is really fun and you can get the DVD tutorial HERE.
This was my first foray into the word of big saws and power tools.
I have always been very nervous around moving blades, but MacGyver gave me some good lessons on how to use the saws safely and now that I am over my timidity, I am loving what I can do with wood!
So many more doors have opened for me. Learning something new always inspires me, ideas flow and my heart is so happy.
I think this is the beginning of something wonderful!

I made templates of all the components, drew the skirts and the heads on my scrap wood (MacGyver has a ton of wooden bits and pieces that I root through for parts) and used the band saw to cut them out. I used a belt sander to refine the shapes.
Wings, collars and arms are cut from templates. The face I used is a drawing I did....I scanned it into Illustrator and played with the shape of the face until it fit my wooden heads.
I made a collage sheet of the face in various sizes so all I have to do later is print out the sheet when I need more faces.
The legs and  neck are quarter inch dowel rod and the bases are from the craft store.


The flowers are raw brass stampings that I enameled with nail polish. I drilled holes in the top of the head and glued in the beads I wired up.
I used a drill press and drilled a hole in the bottom of the head (where the neck goes), the top of the dress (for the neck), two holes in the bottom of each dress and two holes in each base where the legs go.
I should add-  after I covered the dolls in papers but before I put any embellishments on the dolls, I put two coats of matte medium on them, back, front and sides, then added my beads and dimensional fabric paint etc...


I added micro beads and little seed pods that look like pumpkins to the base of this girl and an enameled flower to the base of Flora. I made tentacles from polymer clay and made a little shopping bag out of a jewelry box cut to size.
(The picture below was taken before I added the beads and the seed pods)


These little girls were a lot of fun to make. And now that I can play safely with power tools, the skies the limit!

Saturday, March 21, 2015

The Disastrous Tea Party...or What Really Happened to Marie Antoinette

Alpha Stamps has been having fun with the theme "Marie Takes Tea" this month with lots of food and frills. There is something about playing with tiny things that is so appealing!
Those teeny little cakes and trays of sweets are adorable.
I made up a little story to go with all those tiny things, but I'm afraid poor Marie doesn't fair very well..........


The title medallion is from the digital French Labels Collage Sheet. I put it in Illustrator and scaled it up to the size I needed for the front of my box, printed a fancy typeface for the title and hand-colored the piece with copic markers.
I did the same thing for the inside story medallion.


There was a lavish spread of delicious food.


And quite a glittering crowd emerged to partake of the festivities!


They really enjoyed themselves.....


But alas, all good things must come to an end.


Oh, Marie, Marie.
You always were a little light in the brains department!

Click HERE for links to all the fun supplies!

Supplies List:
Bo Bunny Vintage Double Dot Paper (both sides) in
Passion Fruit, Pink Punch and Shadow.

Marie Takes Tea Collage Sheet
French Ballet Costumes Collage Sheet
French Labels Collage Sheet

8x8 Heavy Chipboard (for the table tops)
Wooden Finial Chess Pawn (the top piece x 3)
Thin Loop Dresden Trim in White (from the White Dresden Border Sampler Set)
Mini Rose Buds-Pale Pink
Diamond Stickles
Mini Strawberry Cake
Mini Heart Tart Cake
Alice Pink Eat Me Cookie
27mm Resin Tea Party Heart Doilies (green)
Ceramic Cupcake Bead
Beads from kit (scattered around the tea table and used to embellish the tags a bit)
Brilliance Pigment Ink Pad-Galaxy Gold
Vintage Photo Distress Ink


Addition:
White Paint
Brass Bead (used for vase of rose buds)


Friday, March 6, 2015

Tin of the Month Club...March

I'm so ready for spring! I was just listening to Joni Mitchell sing 'Just a Little Green' and that is what inspired me to make this wee tin for March.
Just want a little green.....


I'm looking forward to nesty little birds and the dawn chorus. And fresh green buds and the smell of spring. It can't come too soon!


My buddy rackycoo is playing with tins over at her blog Junk&Stuff and you can see her March offering HERE.


My January and February tins are HERE.

Thursday, February 19, 2015

A new year and a clean studio.

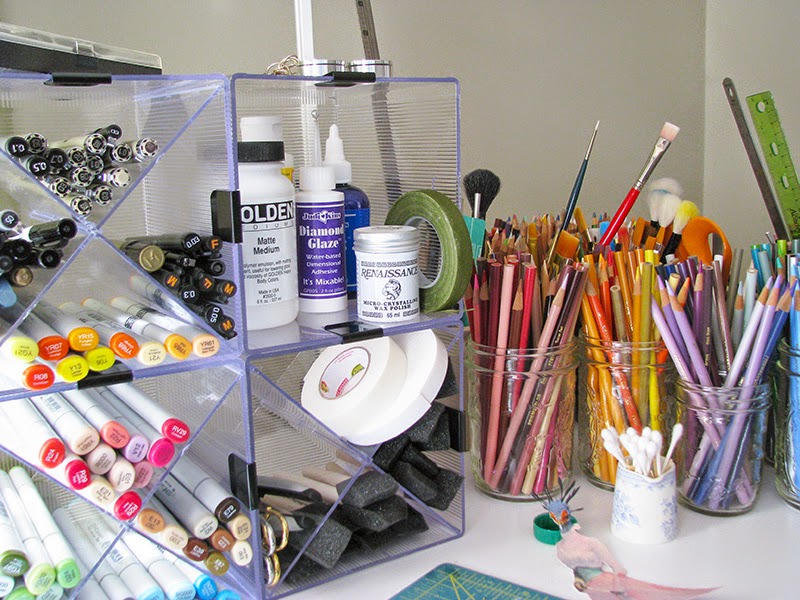
 Around the beginning of every new year I do a major clean up in my studio. All the shelves of odd bits and mysterious pieces that I have collected get a major tidy up.


Things that are in progress or getting prepped get a (ahem) dusting off and get moved to the front.
I handle everything because sometimes magic happens when you pick up an old drawer or some clock parts. Those things get put on my work tables so I can handle them some more. I treat these intuitive moments with mindfulness and nurture them as best I can.


A lot of sorting happens and things that were previously scattered around get put away.


Lost objects are found. I didn't know I had this awesome glitter!


If I don't see something, I forget to use it.....I found these great storage cubes on Amazon for about $6.50 each. You can get them HERE.


My husband (who I call MacGyver cuz he can make anything) made this wonderful lazy susan for me to store the vast amount of colored pencils I have. You can't have too many colored pencils!


He actually bent the piece of wood that's wrapped around the disc, by getting it wet, wrapping it in plastic wrap and sticking the big, long piece inside our baseboard heat register! After it sat in there long enough, he was able to bend it to the shape of the disc. He is so cool.


All the fussing and cleaning is worth it, it clears my mind. I feel my spirit lift and I am so much more productive!
Now I've got a wonderful, clean workspace that will stay that way for about thirty minutes.
Now if I can just put everything away in a timely fashion.........
Yeah.
We know how that goes!

Saturday, February 14, 2015

12 Months of Tiny Tins

Some time ago, I was visiting my buddy in Atlanta and we found these little tiny tins on sale at some store or other we were cruising through. They came in a box of twelve and we each bought a set or two, not thinking much about what either of us was going to do with them.
She recently came up with the idea of a 'Tin of the Month Club' and is decorating the most adorable little tins-one for each month. See her tins HERE.
I decided I wanted to play as well, so here are my offerings for January and February.

Here is January...


February....
And both of them together ...


It's really fun playing with small things!

Friday, February 6, 2015

Cute as a button

When I was told the theme for February at Alpha Stamps was 'Cute as a Button',  I immediately thought of the book (and movie) written by Neil Gaiman called 'Coraline' and the other mother with her creepy button eyes.


In the book and movie, the other mother wants to sew button eyes on Coraline, but she resists. Oops! Looks like she got one. I have to admit, I creeped myself out with this one.


I started out making the house shape from a template I drew and cut the shape out of a piece of sturdy chipboard. I sized the smaller piece of chipboard (covered in the polka dot paper) to the collage image and cut that out as well. I covered both pieces with paper, sanded them down around the edges and inked them up to make them look kind of old and worn.

I glued teeny tiny buttons to the images eys and sewed her mouth shut (ick) with regular needle and thread.
I aged the image the same way as I did the chipboard.


I used foam tape to mount the collage image to the polka dot chipboard and then repeated that to attach the chipboard to the house.


A piece of wire wrapped around an old Christmas ornament makes a great balloon! I glued that down and then very carefully glued the long pieces of thread to the balloon wire. After they dried, I added a bit more glue to the ends just to make sure they were firmly attached.
I gather the threads up and anchored them to the edge of the house with more glue, let them dry, and then using tweezers glued the cross threads of the web down on one end, letting those dry.
After they dried, I glued the other end down and snipped off the extra bits with a pair of nail scissors.


I glued a little wooden block to the back of the piece and mounted it on another piece of paper covered chipboard. I found these big black buttons in my stash, but they were a bit too shiny for me, so I splooshed some matte medium on them and dulled them up nicely and glued them on the piece.
The spider was a chipboard piece I inked black.

For a link to the supplies I used, click HERE.


SUPPLIES LIST:
Sugar and Spice and Everything Nice Collage Sheet
Doll Buttons-4mm Black
8x8 Heavy Chipboard
Papers from the 'Cute as a Button' Kit (Sew Lovely 6x6 Paper Pad)
Brilliance Pigment Ink Pad-Galaxy Gold
Vintage Photo Distress Ink
Garden Insects Cut-Outs
1 1/4 inch Black Buttons
Black Thread

Thanks for stopping by!